Detailed Guide
- 1. What is EC Alert me?
- 2. Creating a New Account
- 3. Login
- 4. Password Reset
- 5. Modifying an Account
- 6. Creating a New Alert
- 7. Viewing an Alert
- 8. Modifying an Alert
- 9. Deleting an Alert
- 10. Suspend the receipt of all alerts
- 11. Logout
- 12. Navigating the top navigation menu of the EC Alert me website
- 13. Navigating the Left Menu Bar of The EC Alert me Website
- 14. Renewing your account
1. What is EC Alert me?
The client interface is a web application and a major component of the EC Alert me project. It serves as the primary gateway for creating and managing customized weather alerts. Clients can custom-define their alert areas, types and conduit options.
2. Creating a new account
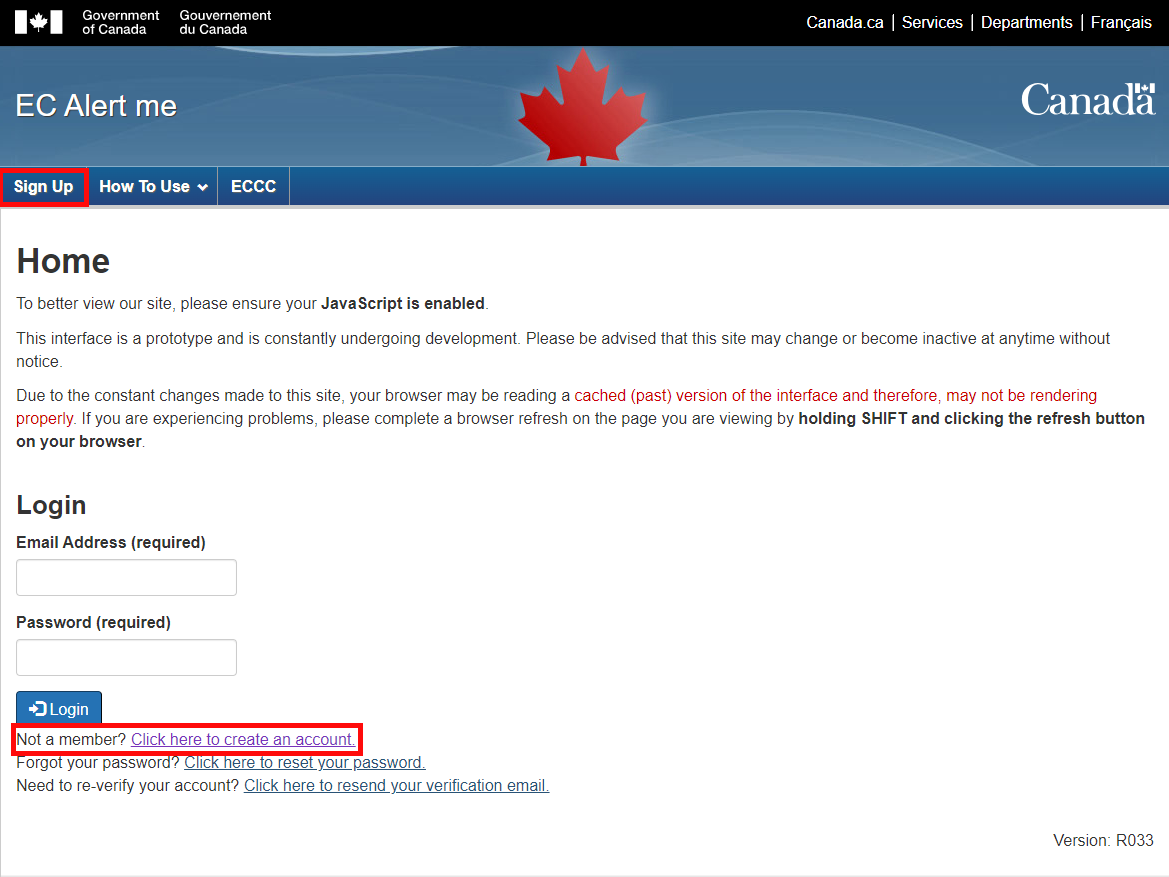
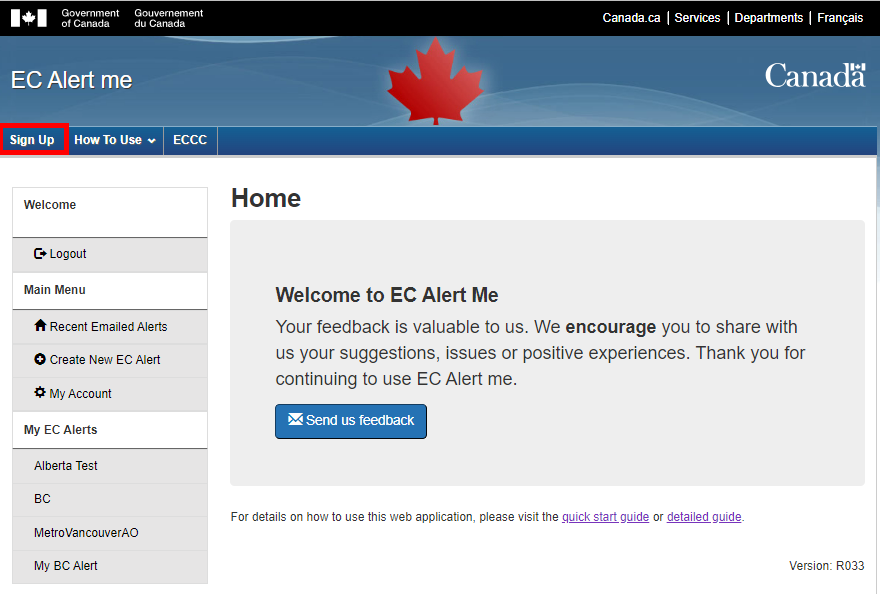
In order to set up their preferences, new client will have to create an account by clicking on the ‘Click here to create an account’ link or the “Sign Up” tab in the top navigation menu.
2.1. Creating User Profile
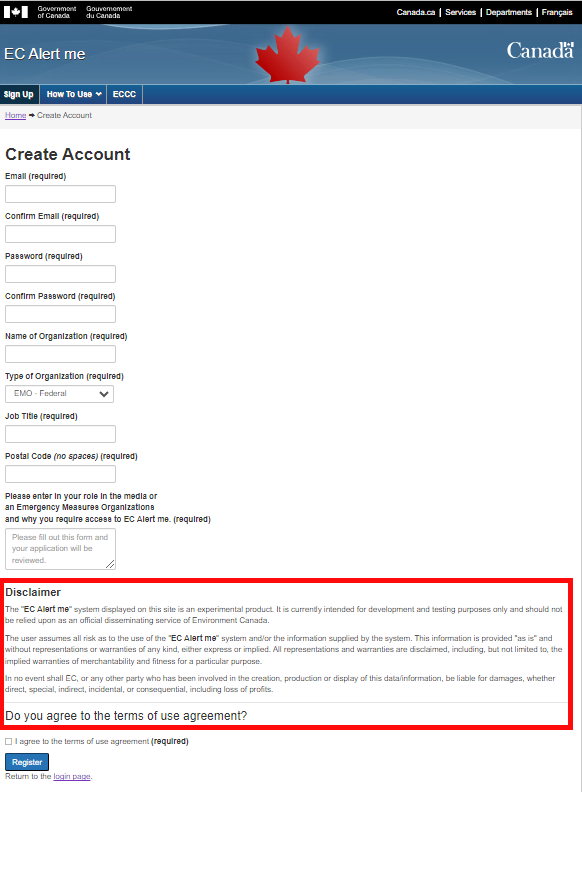
Clicking the “Click here to create an account” link or the “Sign Up” tab in the top navigation menu will bring the client to the ‘Create Account’ form. The client will need to fill out the form and agree to the terms of use agreement. Once all the information has been filled, the client has to click on the ‘Register’ button.
*Note: Only work related information is stored on the registration form.
**Note: The client may use accented characters in their password.
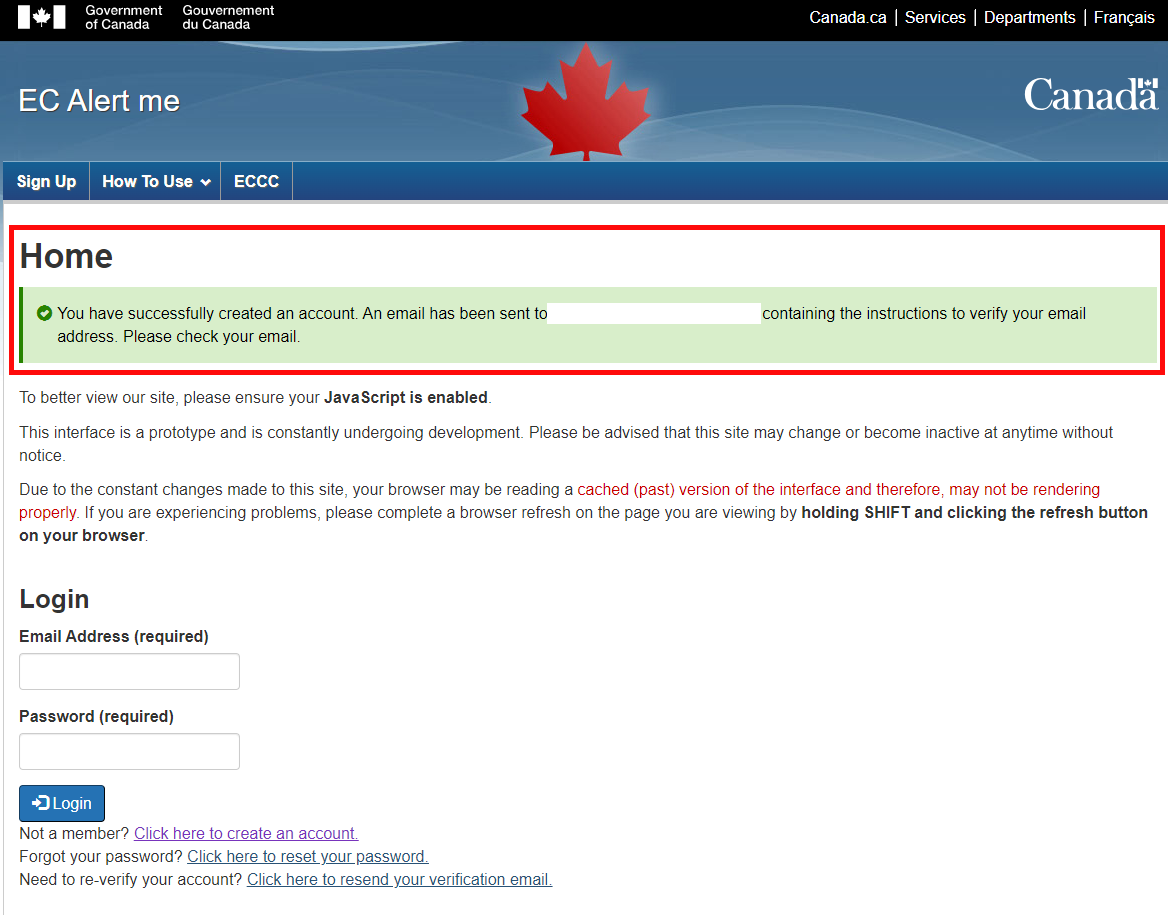
Once the client has successfully registered, they will be brought back to the Login page where the following message will appear in a green box at the top of the page: ‘You have successfully created an account. An email has been sent to <your email address> containing the instructions to verify your account. Please check your email.’.
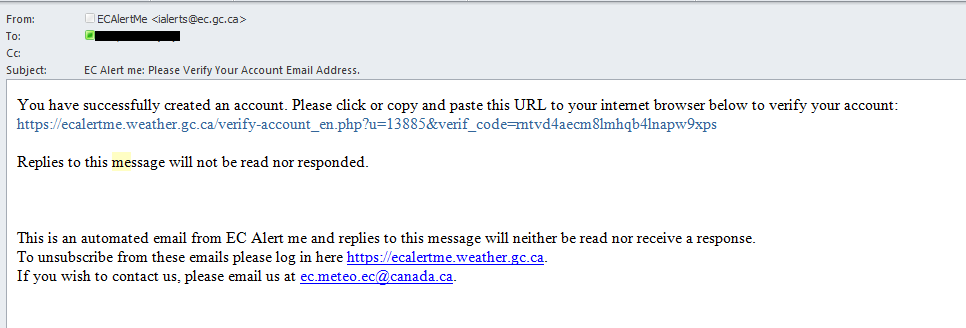
The client will also receive an email, sent to the email address provided in the “Create Account” form, confirming the creation of the client account. The subject of the email will be entitled “EC Alert me: Please Verify Your New Account”. The content of the email will contain a link to the login page and will confirm the verification of the email.
2.2. Verifying Account
The client will now have to verify their account to be able to login. In order to do this, they will have to click on the URL located inside the email that was just received. The link will bring the user back to the Login page where the following message will appear in a green box at the top of the page: ‘You have successfully verified your account. Please login to proceed.’.

*Note: If the client does not verify the account, they will not be able to login
2.2.1. Lost Verification Email
If the user cannot find the verification email, there is another way to resend the verification email.
Trying to access the account without having verified it will result in the following message appear above the password box “Error: Login Failed. Your account does not have access.”. In order to proceed, the client will have to verify their account.
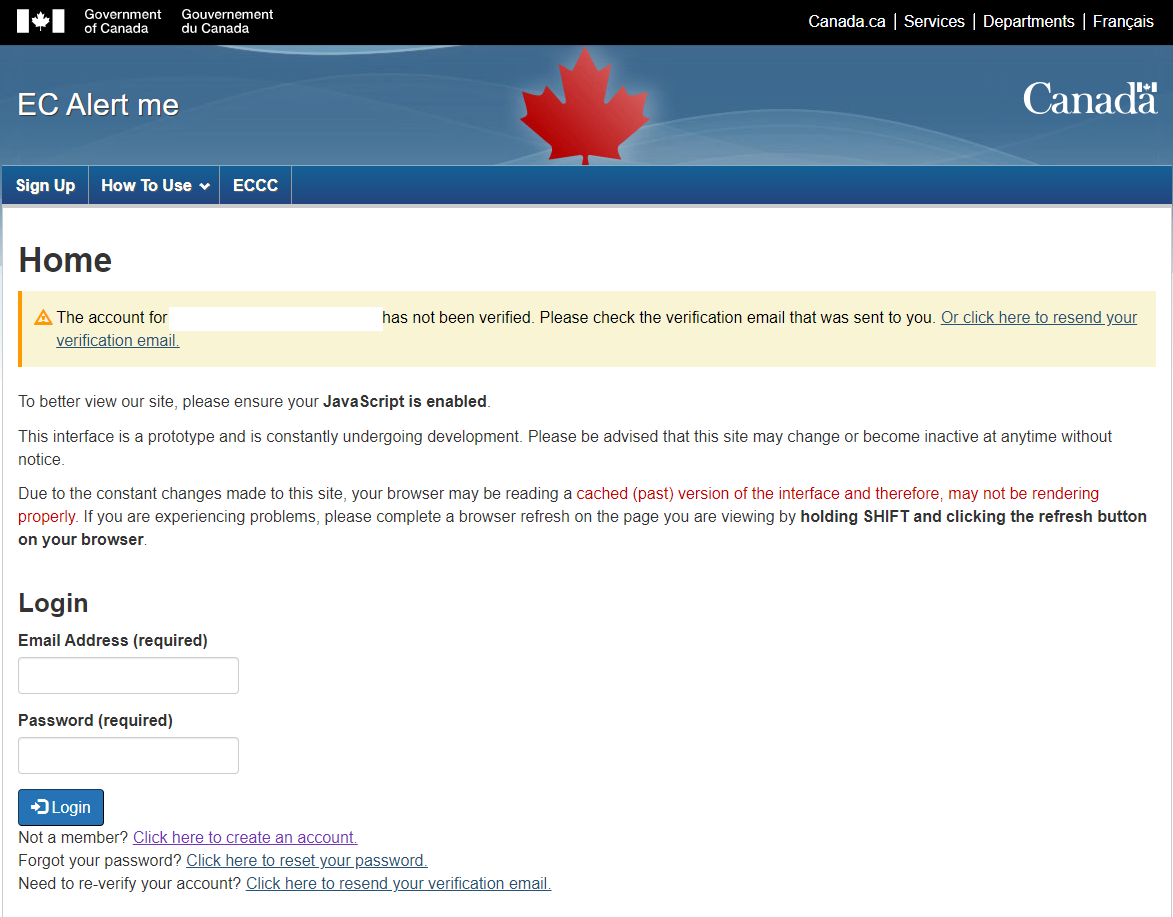
In order to resend the verification email, they will have to select the “Need to re-verify your account? Click here to resend your verification email.” link which will bring the client to the “Account Verification” page.
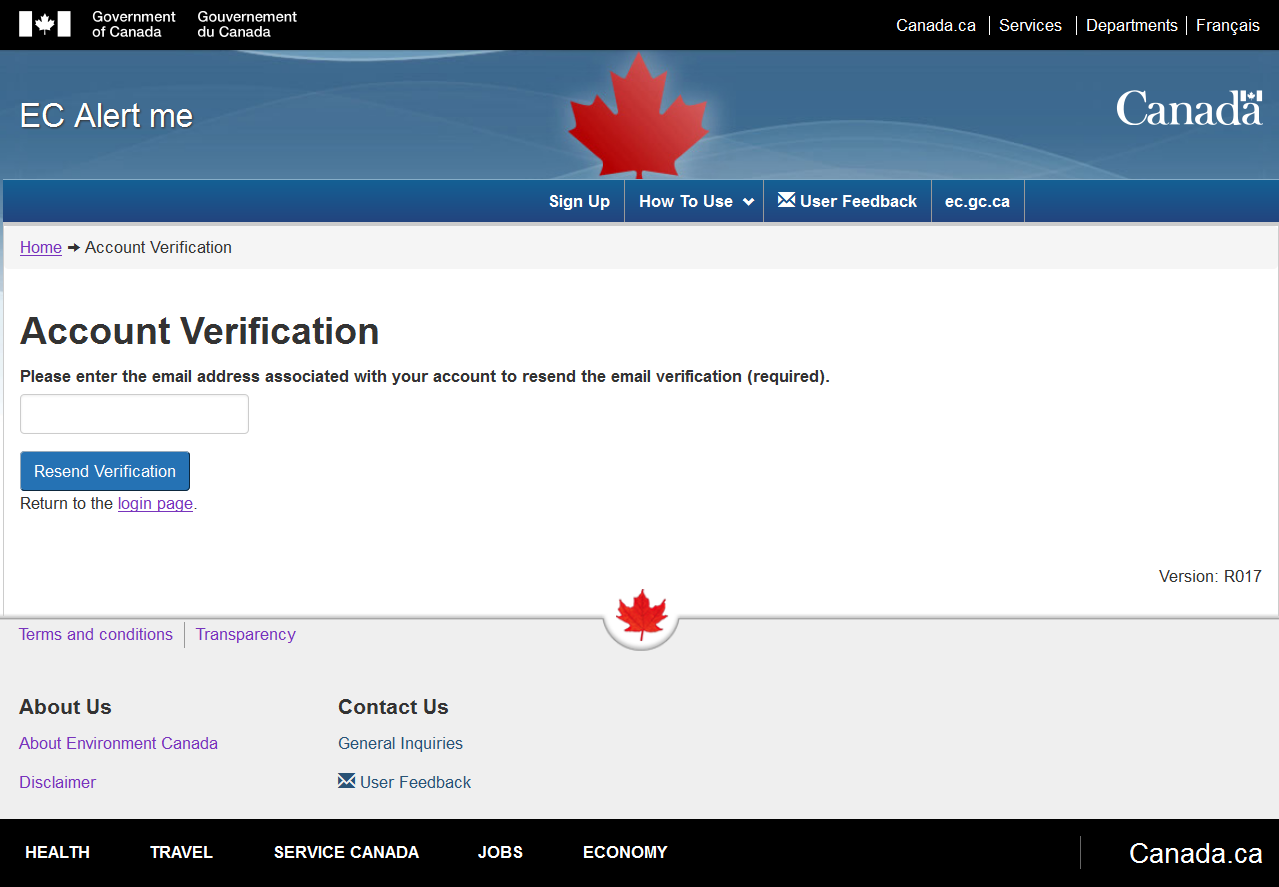
This will bring them to a new page with a form where they will have to provide their email address and press the ‘Resend Verification’ button to submit. A successful attempt shall bring the user back to the login page with a message in a green box stating ‘An email has been sent to <your email address> containing the instructions to verify your account. Please check your email.’.

The user will then receive an email entitled “EC Alert me: Please Verify Your New Account”. The content of the email will contain a link to the login page and will confirm the verification of the account. The user can refer to Section 2.2: Verifying Account for the process of verifying their account.
3. Login
In order to create, modify, delete and/or view alerts, the client must first login to the EC Alert me interface by submitting the email and password they provided when creating their account, and press the ‘Login’ button.
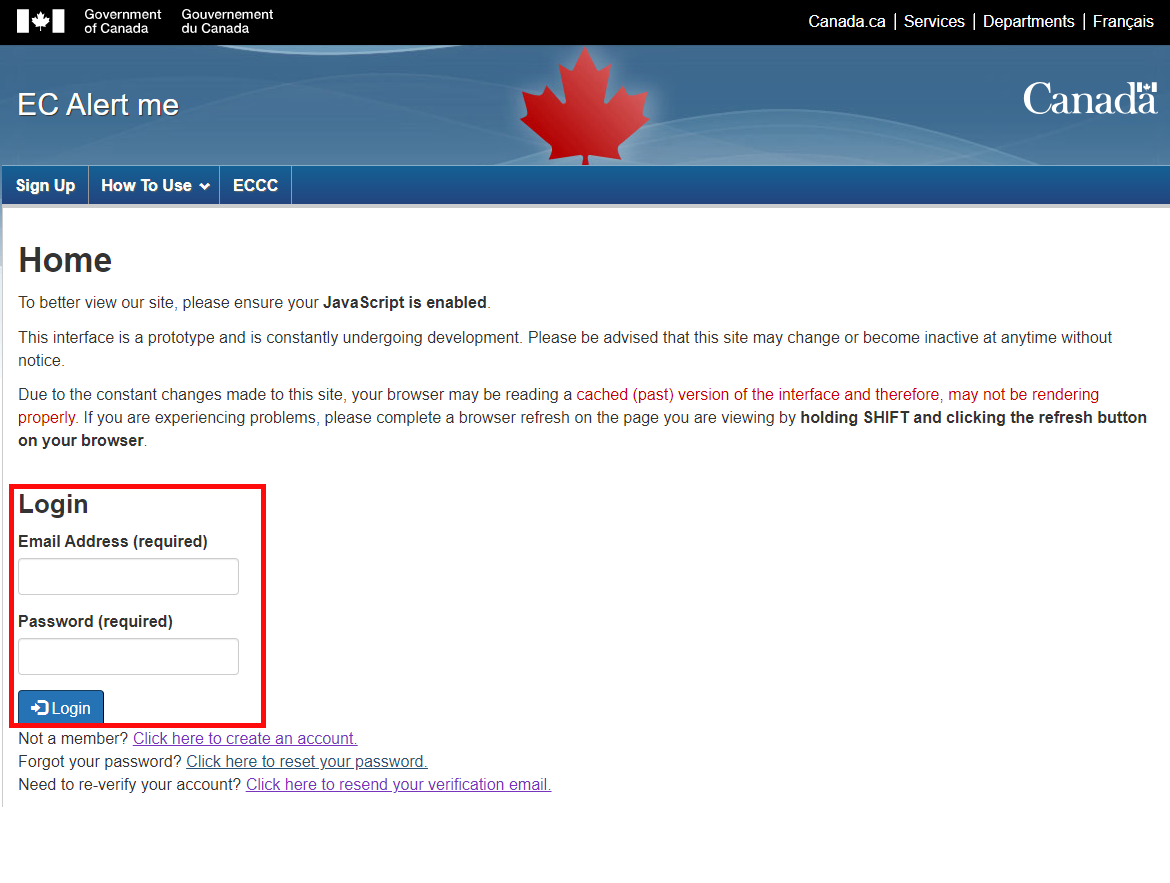
Once the client has signed in, they will be brought to the ‘Recent Emailed Alerts’ page where it will be possible to view all recent alerts (issued, continued, changed and ended).
4. Password Reset
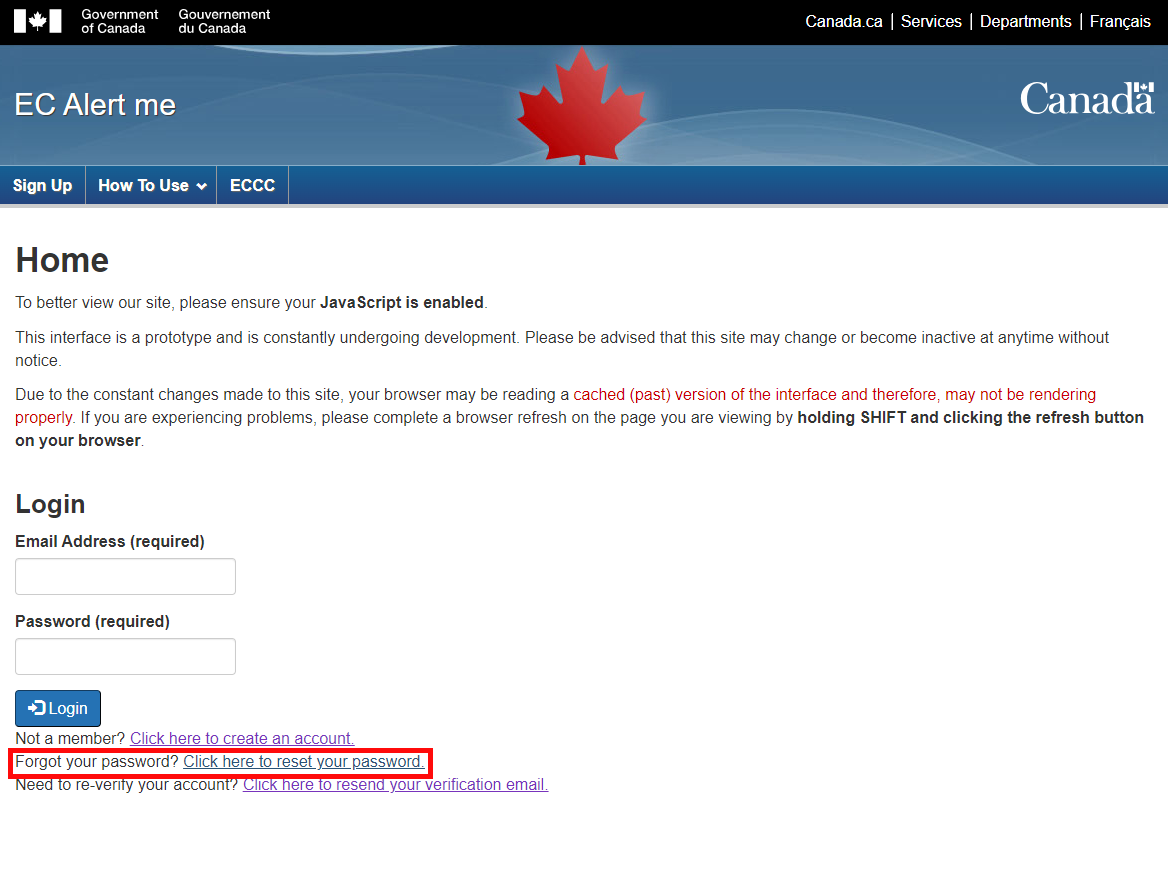
If the client forgets their password, they will be able to reset it by clicking on the ‘Forgot your password? Click here to reset your password’ link on the login page.
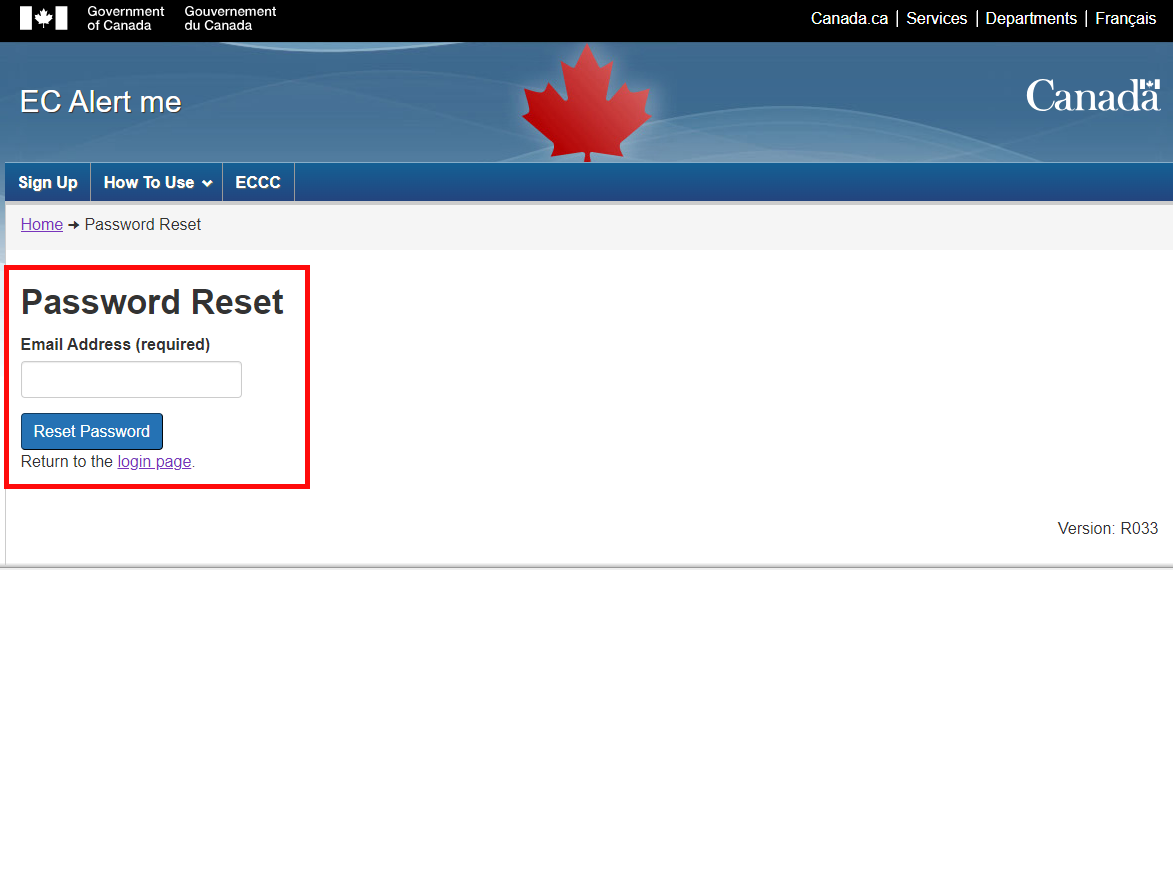
This will bring them to a new page with a form where they will have to provide their email address and press the ‘Reset Password’ button to submit.
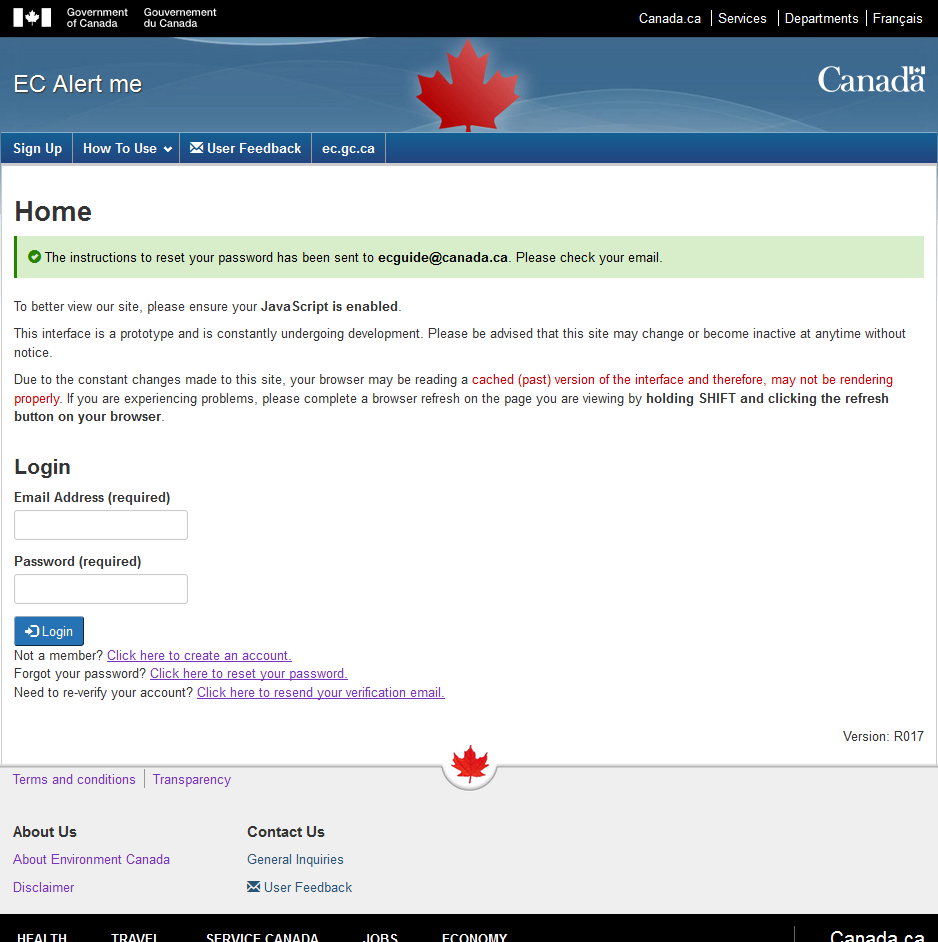
The client will be brought back to the login page where the following message shall be displayed: “The instructions to reset your password has been sent to <your email address>. Please check your email.”. They will have to verify their email to reset their password.
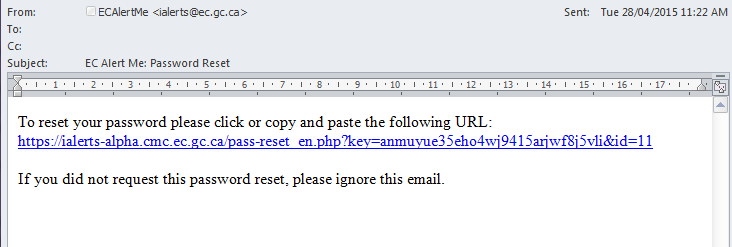
The email will contain a link to the password reset page.
On the password reset page, the client will have to enter a new password in the two boxes. Once they have entered the new password they will have to select the “Change Password” button to submit their changes.
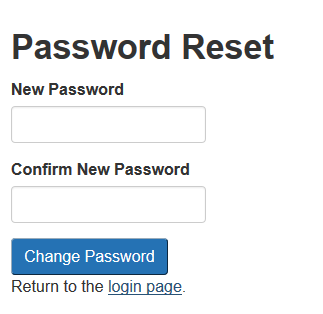
A successful attempt shall bring the user back to the login page with a message in a green box stating ‘Your Password Has Been Changed Successfully. The password has been changed for <your email address>. Please login to proceed’.

5. Modifying an Account
Clients can modify their account information by selecting the “My Account” link in the left-bar menu.
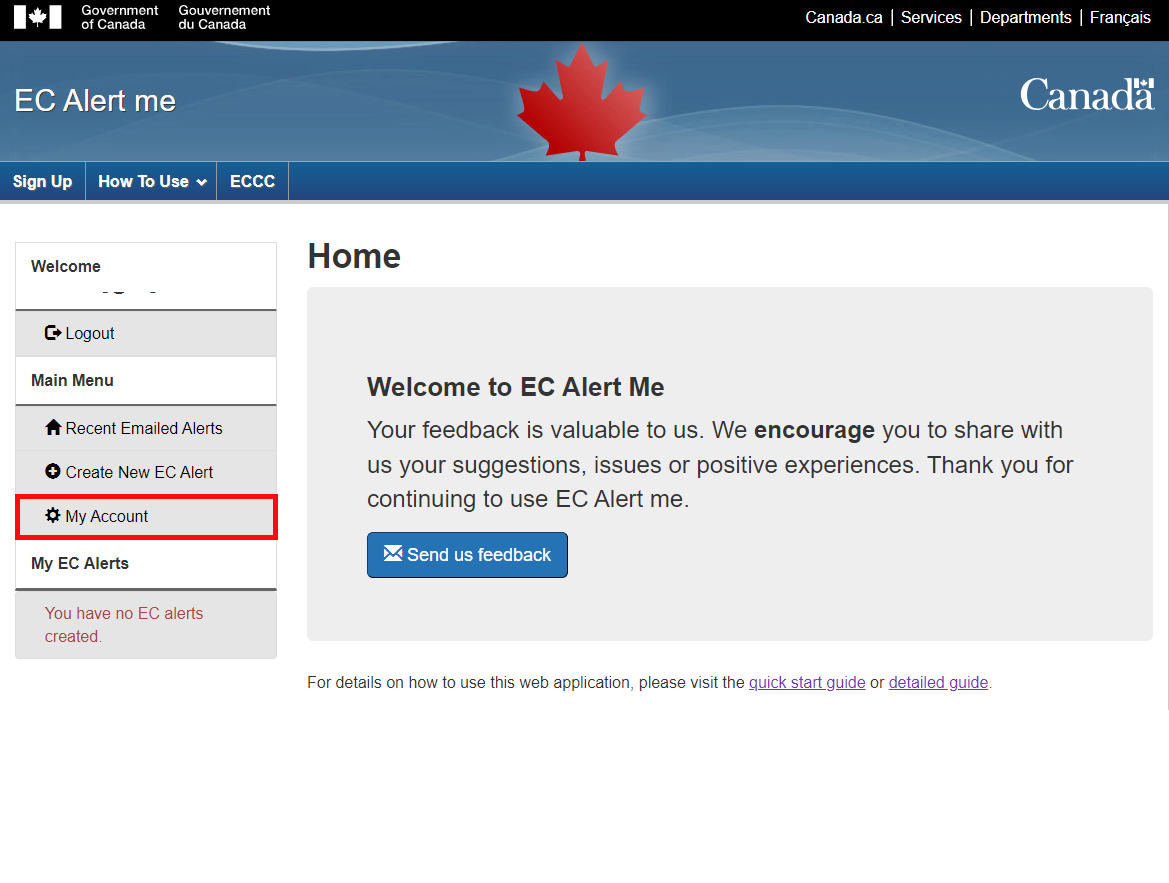
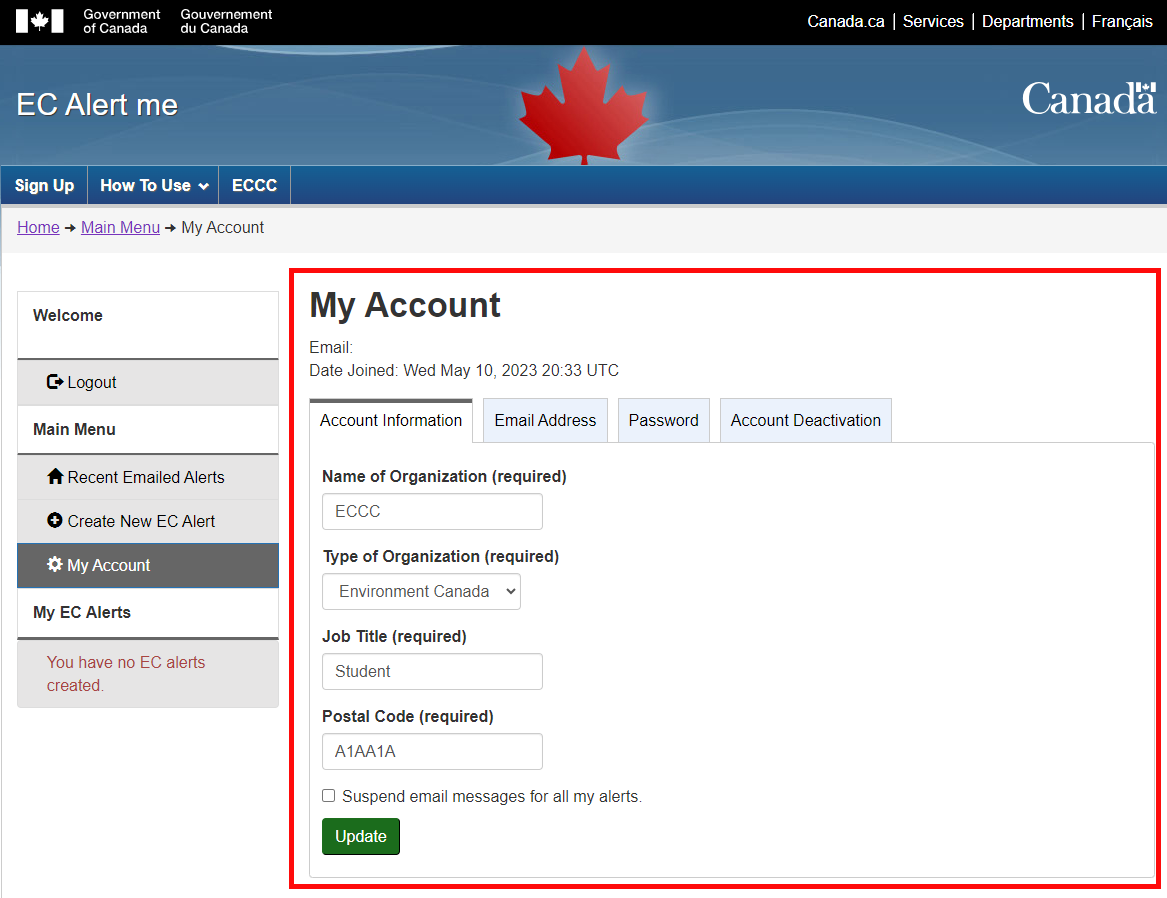
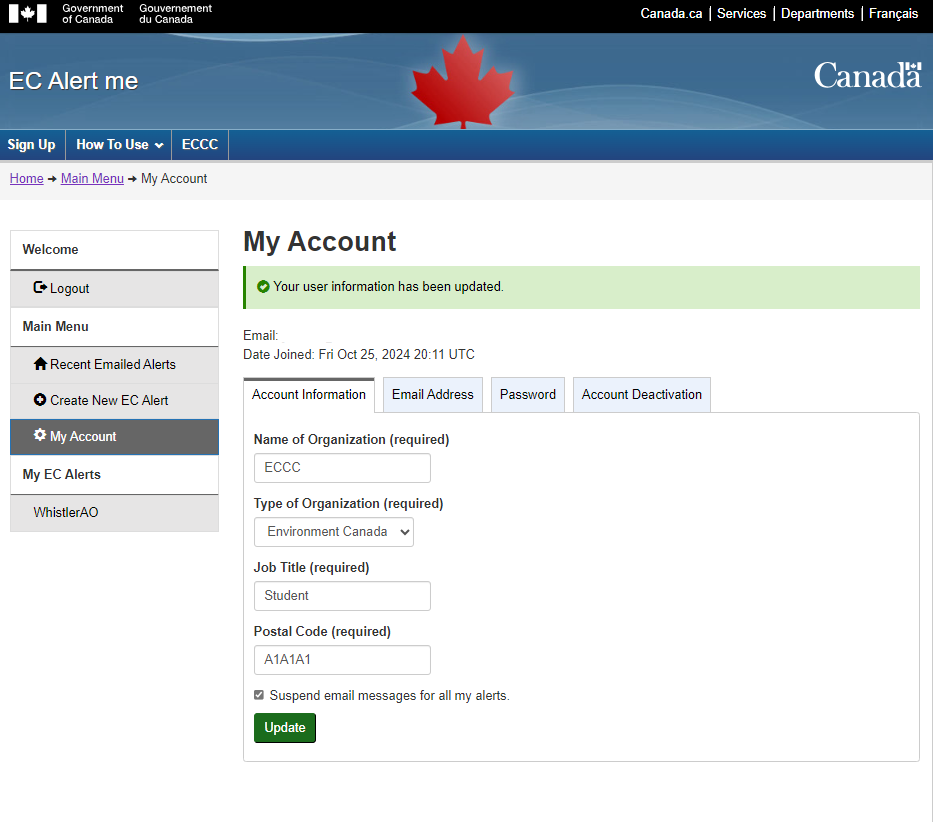
Once the link has been selected, a new page named ‘My Account’ will be displayed. This page is divided into four tabs:
- The ‘Account Information’ tab will allow a client to change their name of organization, type of organization, job title, and postal code or suspend the email messages for all their alerts.
- The ‘Email Address’ tab will allow a client to change their email address and the email address of all alerts attached to that specific email.
- The ‘Password’ tab will allow a client to change the password for their account.
- The ‘Account Deactivation’ tab will allow a client to deactivate their account after confirming this choice via a confirmation email. Once confirmed via this email access to their account as will be removed and they will receive no further emails from EC Alert me.
Once the changes have been made in a particular tab, they will need to click on the ‘Update’ button. Clicking update will only change the information specific to the tab they are currently in.
Once the account has been modified, a message in a green box stating ‘Your client information has been updated’, will appear at the top of the page.

If the client forgets their password, they can refer to section 4 for more details.
5.1. Changing Account Email
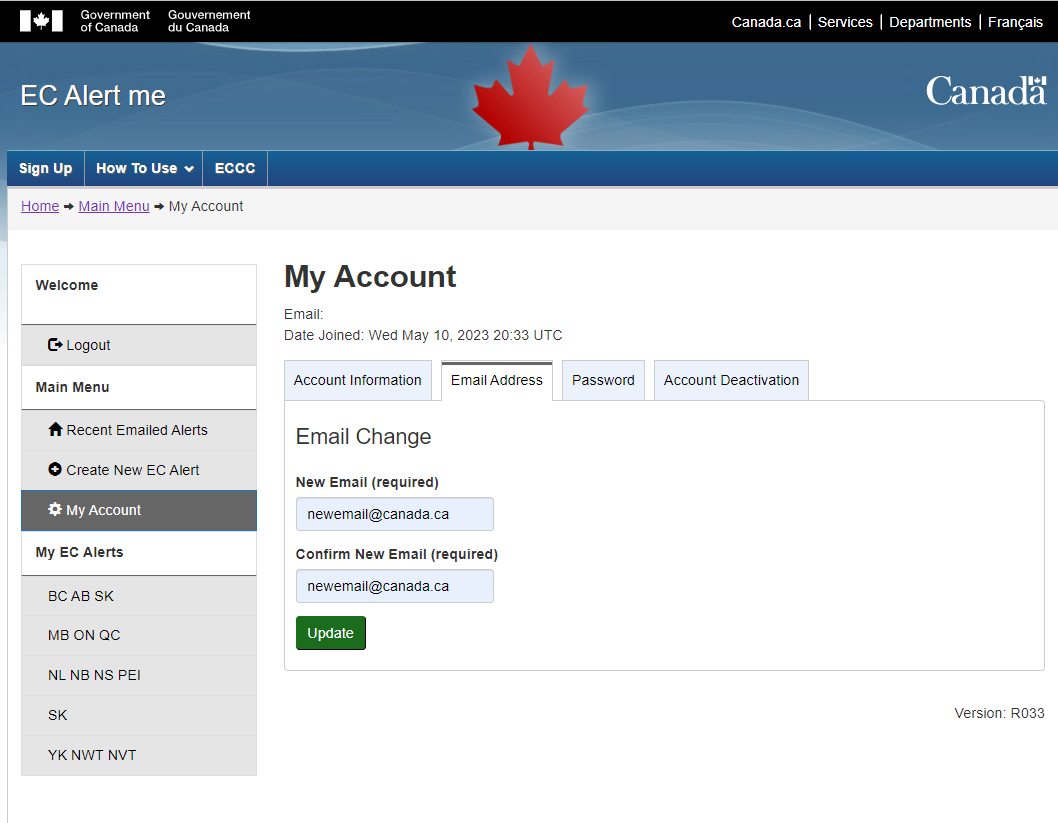
The client can change their account email by selecting the ‘Email Address’ tab.
The client needs to fill out the ‘New Email’ and ‘Confirm New Email’ fields and then click the ‘Update’ button.
Once the change email form has been submitted, the client will be asked to confirm if they wish to change their email.
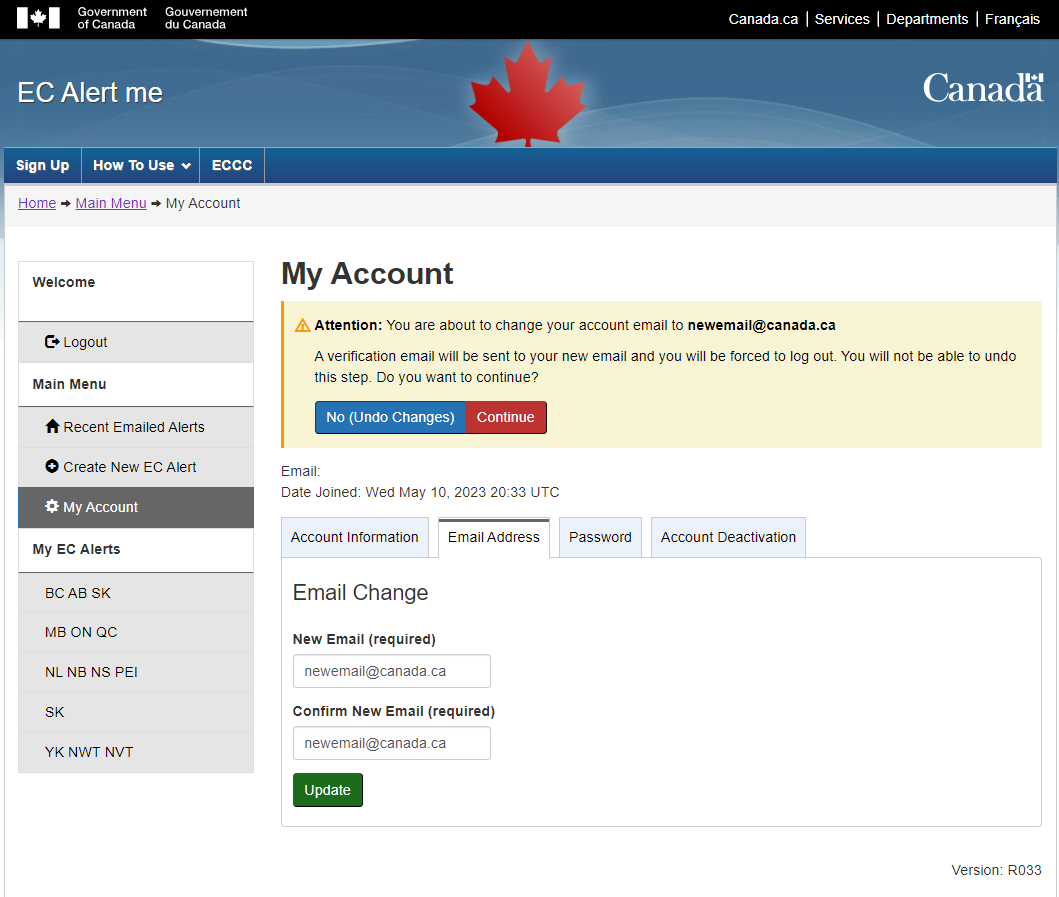
If the client selects ‘No (Undo Changes)’, then the client will be brought back to the change email form and no changes will be made.
If the client selects ‘Continue’, then they will be logged out of EC Alert me and sent a confirmation email to the new email they entered in the change email form
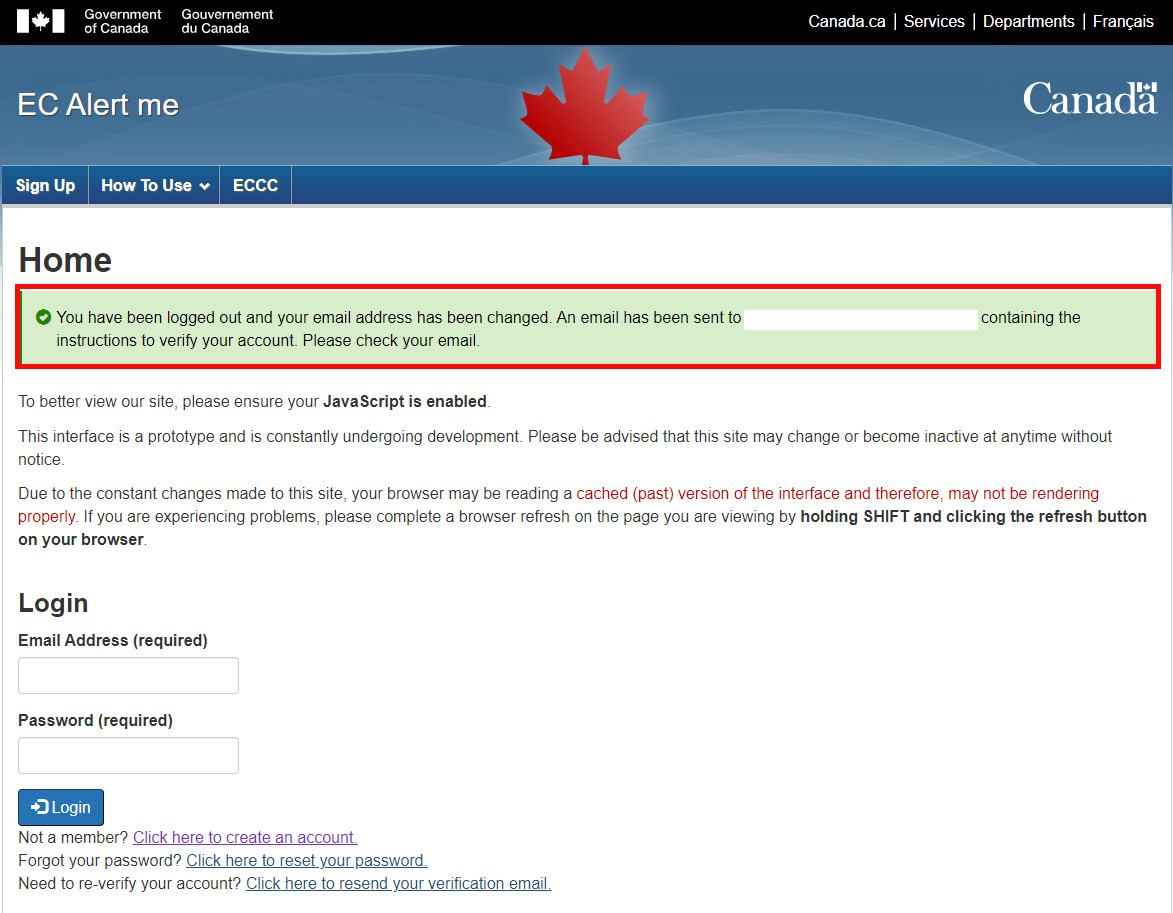
The email sent to the new email address will have a link to confirm the email change. The client must click the link to be able to log in with their new email address. Until the new email address has been confirmed, the client can log in with their old email address.
Once the confirmation link has been clicked, the client will be shown a success alert and they will be able to login using their new email address.
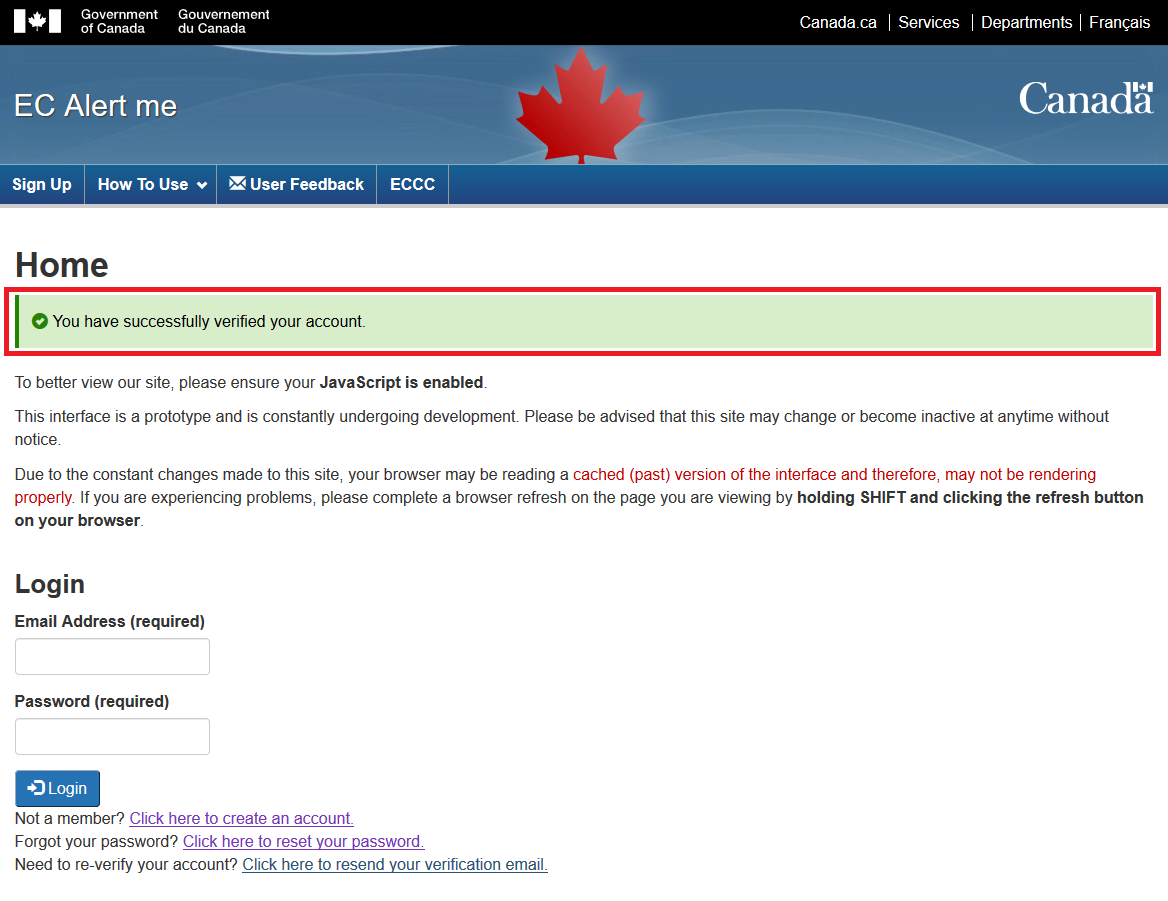
Upon successfully logging in, the client will see their new email on the navigation menu.

5.1.1. Lost Confirmation Email
If the client loses their confirmation email, they can log in with their old email and return to My Account. Once the ‘Email Address’ tab is selected, the client can click the ‘Resend Confirmation Email’ button to have a new confirmation email sent to their new email address.

6. Creating a New Alert
The client will create a new alert when they wish to be informed of certain conditions/events occurring in a designated area. They can create as many alerts as they want.
In order to create an alert, the client must select the ‘Create New Alert’ section in the left bar menu.
This will redirect the client to the first step (out of four steps).
*Note: The client has to complete all the following four steps in order to successfully create an alert.
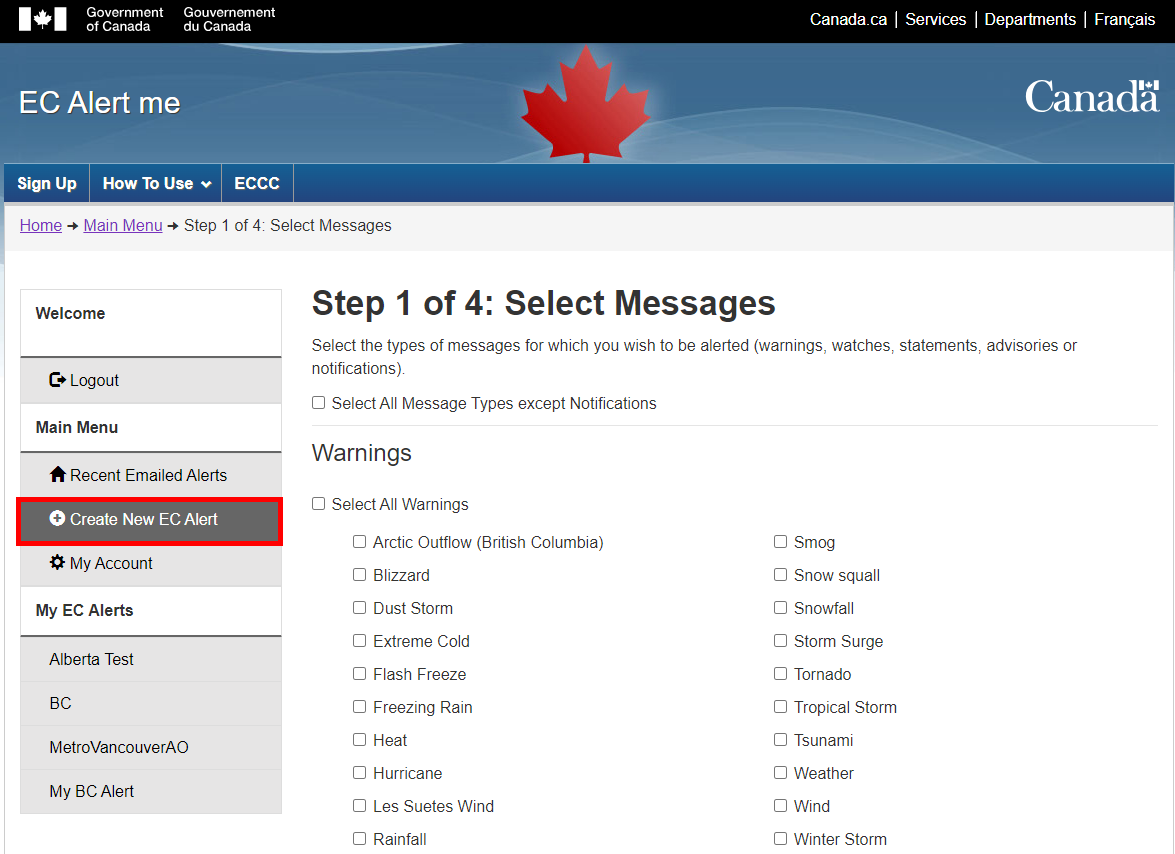
6.1. Step 1 of 4: Select Message
The first step (Select Messages) allows the client to choose what type of messages they wish to receive. They can choose as many message types as they wish in the warnings, watches, statements, and advisories lists.
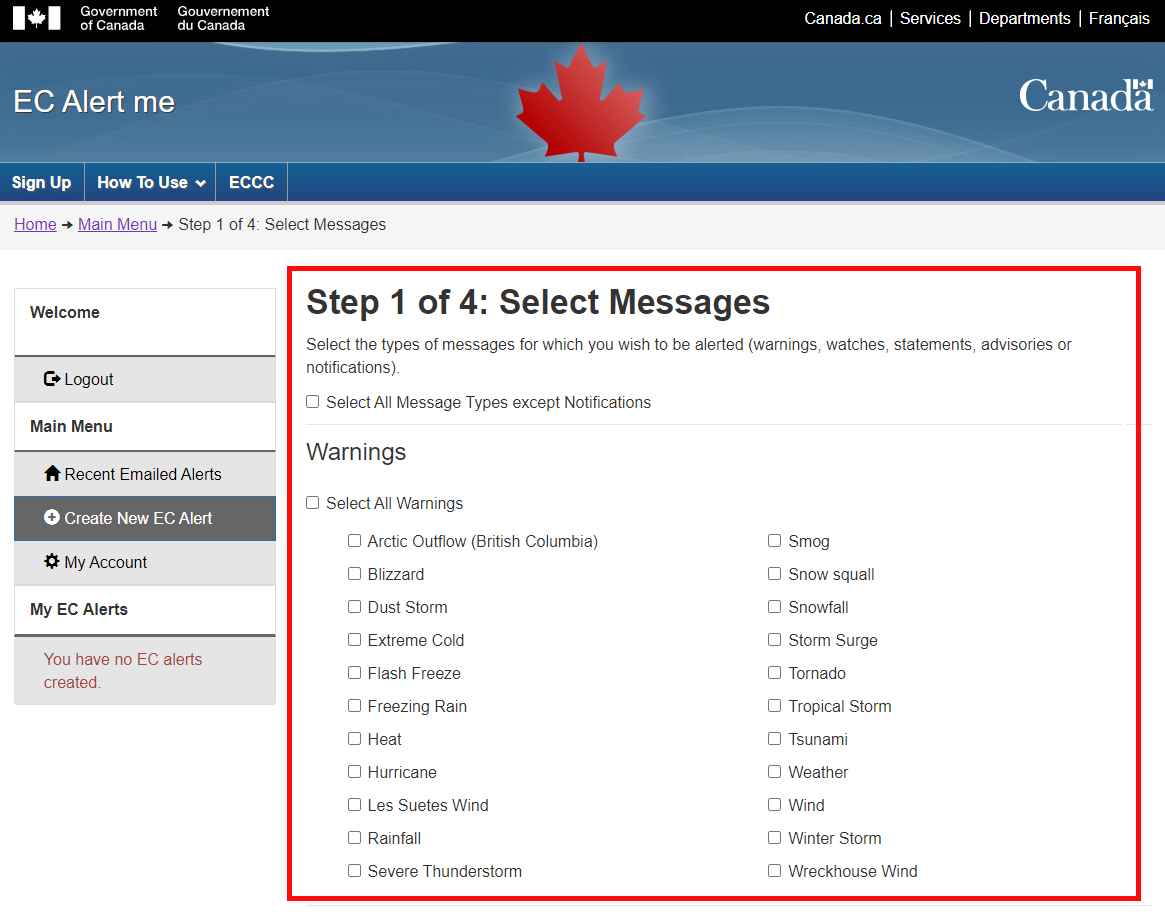
Once the client has chosen the types of messages from the lists, they can proceed to the second step by pressing the 'Next' button.
6.2. Step 2 of 4: Create Alert Area
The second step (Create Alert Area) allows the client to choose the area for which they wish to be alerted during specific conditions.
There are multiple ways of selecting the desired sub-regions: with the interactive map tab, by name or CLC tab, or by province tab.
The map legends display the appropriate shadings of the map to indicate selected regions and unselected regions. Depending on the layers selected for display, map legend will be updated accordingly.
*Note: The regions are selected according to the “EC Warning Sub-region” overlay. In order to select regions from the air quality, tsunami, and/or coastal flooding program, the user needs to select a public region that intersects or overlaps an air quality, tsunami, and/or coastal flooding region. All other regions (from the other programs) located within the selected regions will be selected and will be displayed in Step 4 of 4: Review and Final Submission.
6.2.1. Map Settings Tab
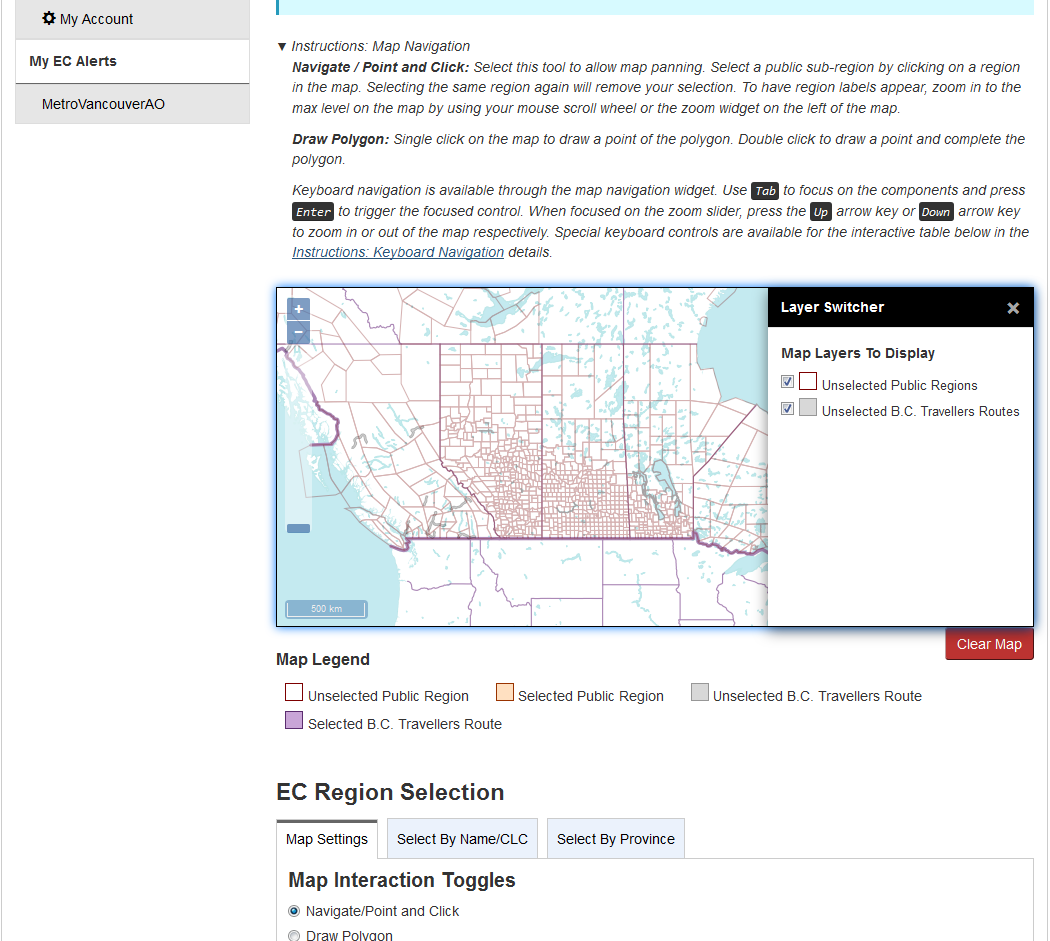
6.2.1.1. Map Layers to Display
First, choose the layers to display. At the top right side of the map, click on the blue menu control for the layer switcher to appear. For public regions, confirm "Unselected Public Regions" is checked. For B.C. Travellers Routes (Highways), confirm "Unselected B.C. Travellers Routes" is checked. Depending on the layers selected for display, map legend will be updated accordingly. If a layer is not selected for display, they cannot be selected through Point and Click or by drawing a polygon.
6.2.1.2. Select Manually
The first way to select an alert area is by manually selecting the sub-regions. In order to do this the client has to select the ‘Navigate/Point and Click’ option under the Map Settings Tab.

Once the ‘Navigate/Point and Click’ option has been chosen, the client can manually select a sub-region by clicking on a region in the map.

The selected sub-regions will be highlighted with a dark red outline and a light red fill. The colors may differ depending on the layers selected. Refer to the map legend for correctness. When hovering over the selected sub-region, its name, CLC #, warning region and province will be displayed in a small rectangle below the mouse cursor. This information will also appear in the ‘Areas Added on Map Table’.
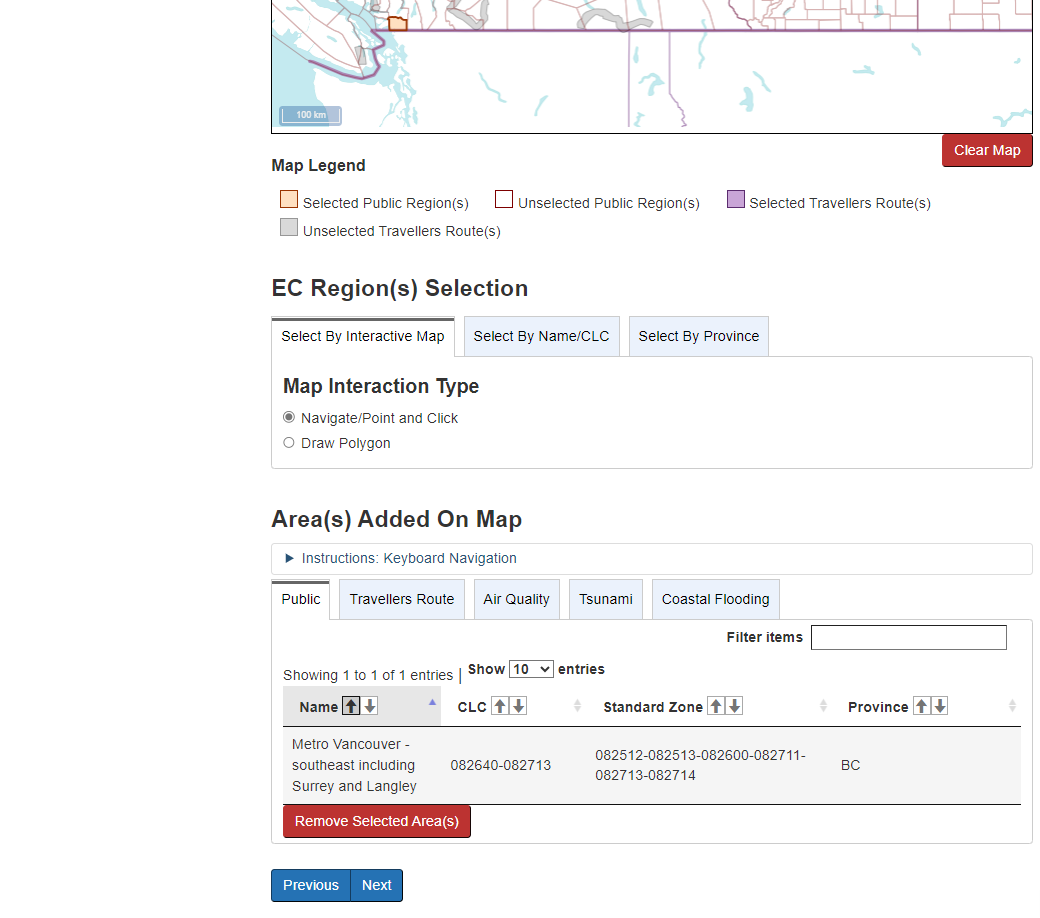
If the client wishes to remove a selection, they can re-click on the region (in the map) or can select the desired sub-region in the table and click on the ‘Remove Selected Area’ button. The client also has the ability to instantly clear the map of all selected sub-regions by clicking on the “Clear Map” button located on the right hand side under the map.
6.2.1.3. Select by Drawing Polygon
The second way to select an alert area is to draw a polygon on the map. In order to do this the client has to select the ‘Draw Polygon’ option under the Map Settings Tab.
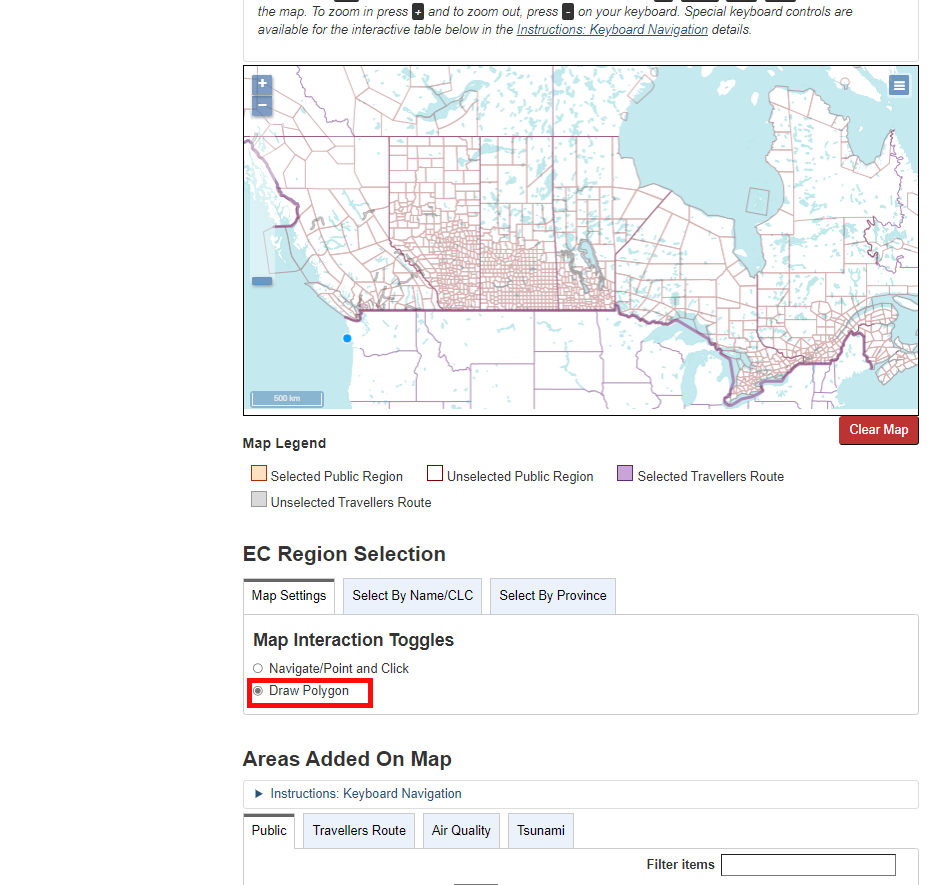
Once the ‘Draw Polygon’ option has been chosen, the user will be able to draw a polygon. Clicking on the map will start creating the edges of the polygon. In order to close the polygon, the user has to double click.
*Note: The polygon can be as big as the client wants as long as all the selected sub-regions are within Canada’s borders.
**Note: Regions found in different issuing office zones will be displayed separately in the email message and in the web page.
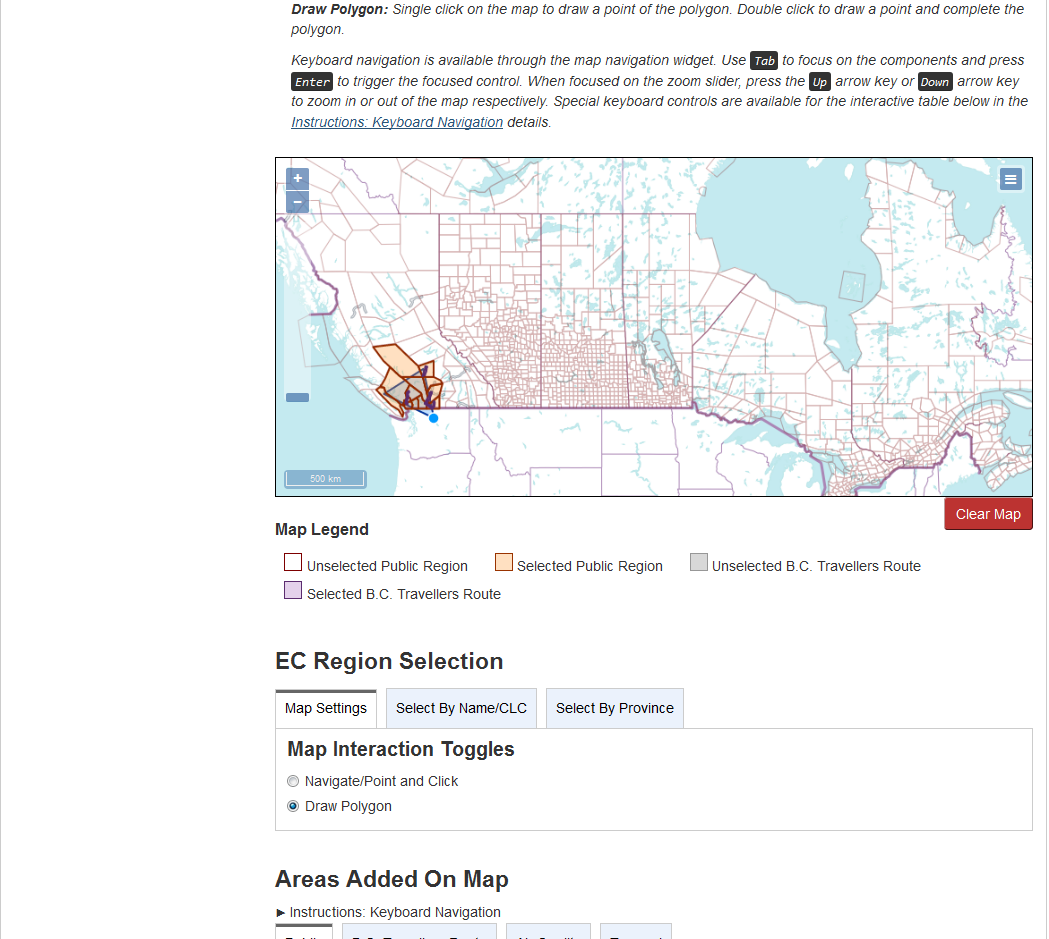
The selected sub-regions will be highlighted on the map with a dark red outline and a light red fill. The colors may differ depending on the layers selected. Refer to the map legend for correctness. When hovering over the selected sub-region, its name, CLC #, warning region and province will be displayed in a small white box above the sub-region. This information will also appear in the ‘Areas Added on Map Table’.
*Note: It is important to note that all sub-regions that are touched by the polygon will be included in the alert zone.
If the client wishes to remove a selection, they can re-click on the region (in the map) or can select the desired sub-region in the table and click on the “Remove Selected Area” button. The client also has the ability to instantly clear the map of all selected sub-regions by clicking on the “Clear Map” button located on the right hand side under the map.
*Note: If the user removes a sub-region, the user-created polygon will disappear however all other sub-regions will remain selected.
6.2.2. Select by Name or CLC
6.2.2.1. Select by Warning Sub-region Name
Another way to select an alert region is by selecting a warning sub-region name in the drop down menu. The client can do this by first selecting a province in the drop down menu and then selecting the sub-region by finding its name in the second drop down menu.
*Note: The user has to select a province in order to activate the “Warning Sub-region Name” field.
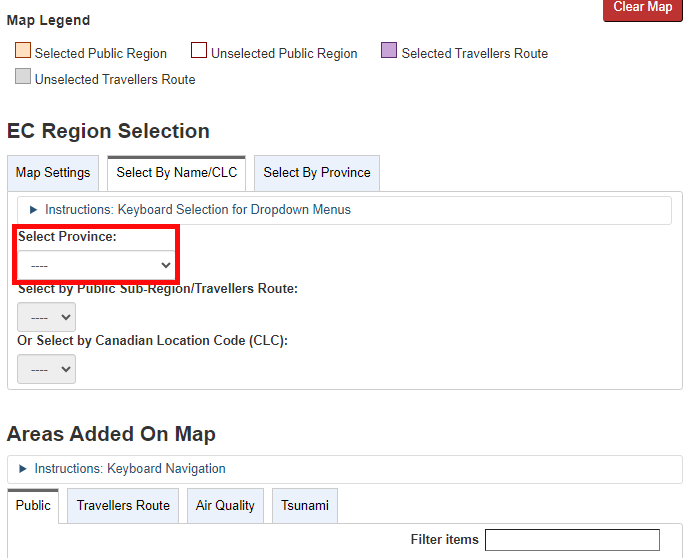
*Note: The “Warning Sub-Region Name” field has now been activated since a province has been selected.
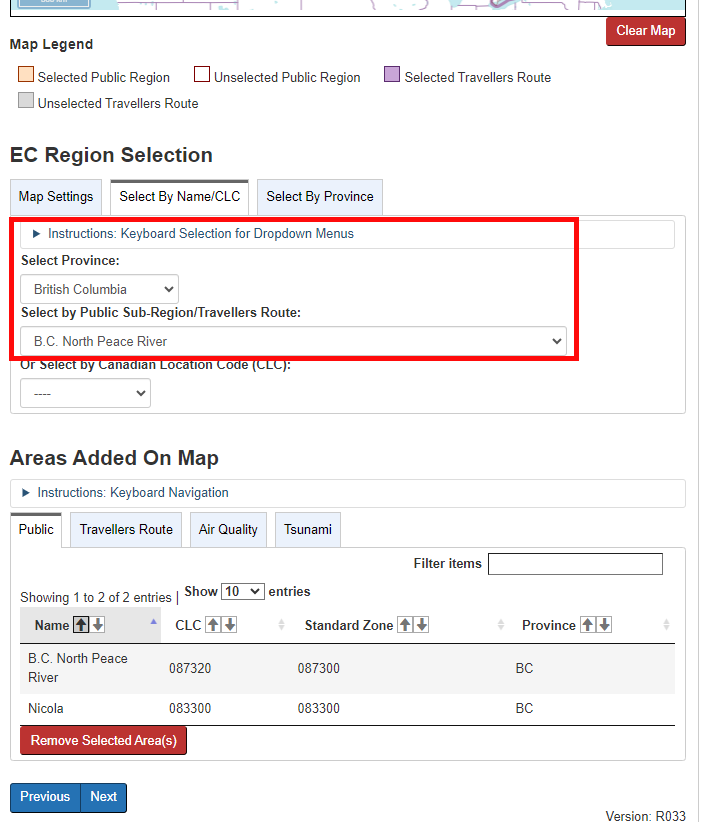
Once a sub-region has been selected, it will be highlighted on the map with a dark red outline and a light red fill. It will also appear in the “Areas Added On Map” box along with the name, CLC #, Warning Region # and Province.
If the client wishes to remove a selection, they can re-click on the region (in the map) or can select the desired sub-region in the table and click on the “Remove Selected Area” button. The client also has the ability to instantly clear the map of all selected sub-regions by clicking on the “Clear Map” button located on the right hand side under the map.
Selected Area” button. The client also has the ability to instantly clear the map of all selected sub-regions by clicking on the “Clear Map” button located on the right hand side under the map.
*Note: Regions have to be selected according to the public program. In order to select regions from the air quality, tsunami, and/or coastal flooding program, the user needs to select a public region that intersects or overlaps an air quality, tsunami, and/or coastal flooding region.
6.2.2.2. Select by Canadian Location Code (CLC)
Another way to select a sub-region is by Canadian Location Code (CLC) in the drop down menu. (For more information regarding CLCs visit Environment Canada's web site). The client can do this by first selecting a province and then selecting a sub-region by CLC in the third drop down menu.
*Note: The user has to select a province in order to activate the “Canadian Location Code” field.
**Note: The Canadian Location Code field has now been activated since a province has been selected.

Once a sub-region has been selected, it will be highlighted on the map with a dark red outline and a light red fill. It will also appear in the ‘Areas Added On Map’ box along with the name, CLC #, Warning Region # and Province.
If the client wishes to remove a selection, they can re-click on the region (in the map) or can select the desired sub-region in the table and click on the ‘Remove Selected Area’ button. They can remove all selected regions on the map at once by clicking on the ‘Clear Map’. The client also has the ability to instantly clear the map of all select sub-regions by clicking on the “Clear Map” button located on the right hand side under the map.
6.2.3. Select by Province
Another way to select an alert region is by selecting the whole province/territory at the same time. The client will select a province or territory from the list. This will select all the regions within the province or territory.
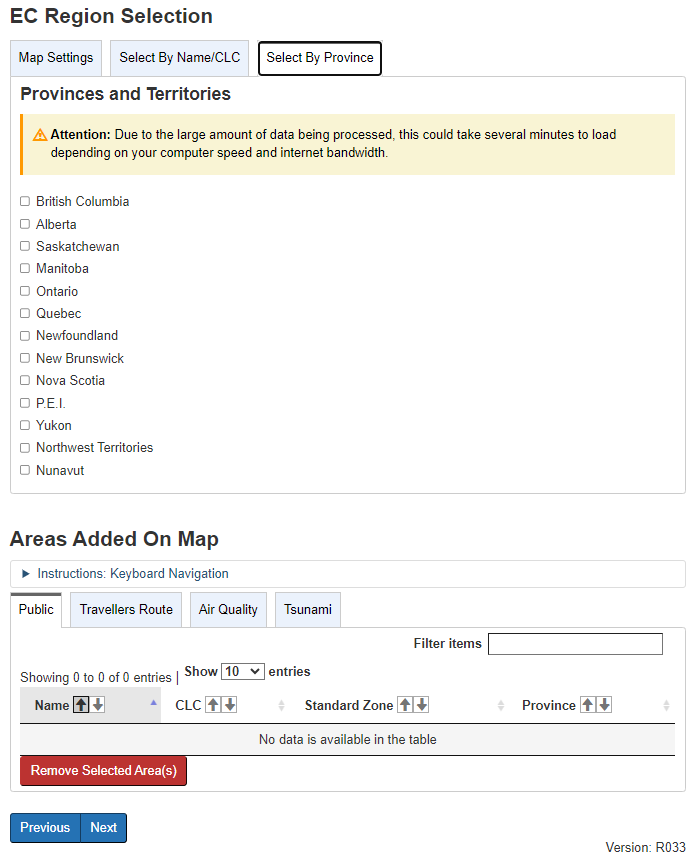
*Note: It may take a few minutes to select all the regions.
Once all the regions in the province have been selected, they will be highlighted on the map with a dark red outline and a light red fill. They will also appear in the ‘Areas Added On Map’ box along with the name, CLC #, Warning Region # and Province.
If the client wishes to remove a selection, they can re-click a the region (in the map) or can select the desired sub-region in the table and click on the ‘Remove Selected Area’ button. They can remove all selected regions on the map at once by clicking on the ‘Clear Map’. The client also has the ability to instantly clear the map of all select sub-regions by clicking on the “Clear Map” button located on the right hand side under the map.
6.3. Step 3 of 4: Assign Alert Settings and Preferences
The third step (Assign Alert Settings and Preference) allows the client to set the alert parameters. The client will assign a name to the newly created alert as well as choose which email address will be receiving the alert. They will choose the language of the message as well as the alert transitions they wish to receive: Issued, Continued and/or Ended. They will also decide whether they prefer a long or short formatted email message (the long message is the default) and whether they would like to suspend the alert.
*Note: The alert transitions “Issued” and “Ended” will automatically be selected. If the user wishes to receive “Continued” messages, they will have to select the checkbox manually.
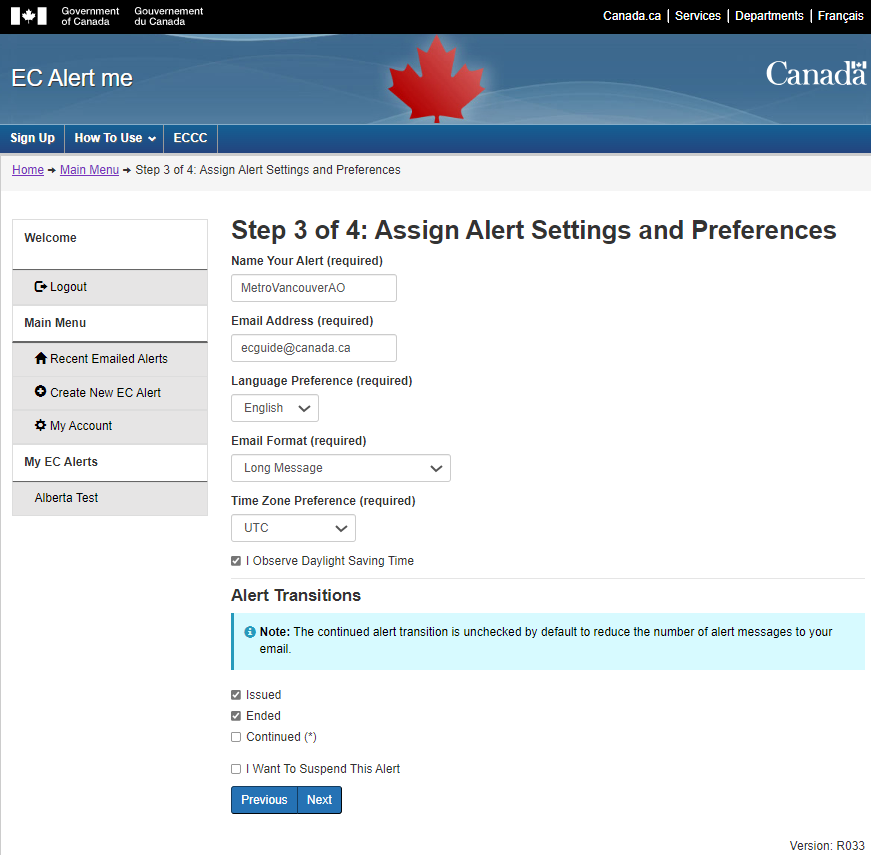
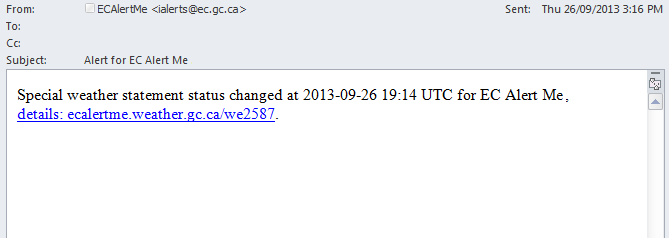
The short formatted message consists of a 140 character message that will be displayed according to the following template:
<Message type> status changed at <date and time> for <Alert Name>, details.
The client will be able to click on the ‘Detail’ link in order to be brought to the message details.
The long formatted message consists of all the information pertaining to the alert including the alert details.
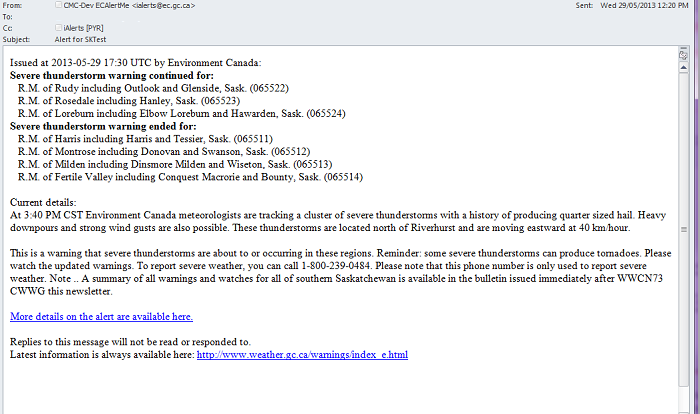
*Note: During the selection process the user selected sub-regions which are smaller entities of larger regions. Affected regions might be displayed at the parent region level or the sub-region level depending on the issued warning (see section 6.4: Step 4 of 4 for parent region and sub region relation).
Once the client has assigned alert settings and preferences, they can proceed to the fourth and final step by clicking on the ‘Next’ button.
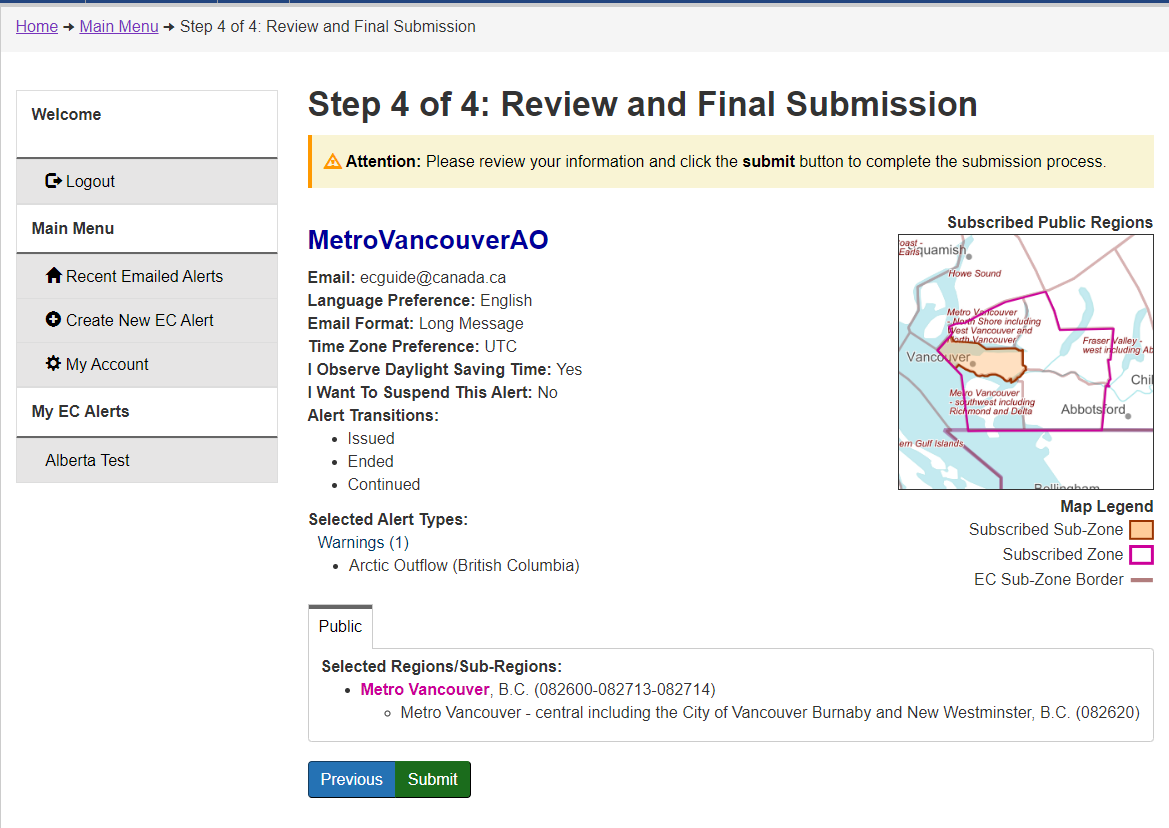
6.4. Step 4 of 4: Review and Final Submission
The fourth step (Review and Final Submission) allows the client to confirm the information he provided during the previous steps. The client can reread the information to ensure that the alert name, the email address the message is sent to, the language preference, the email format, the time zone preference, the daylight saving time preference, the alert transitions, the selected alert types and the selected regions are all correct. In order for the alert to be submitted and created, the client must click on the ‘Submit’ button located at the bottom of the page.
Selected sub-regions shall be listed under their respective parent region. The parent region will be displayed in a pink bolded font while the sub-regions will be listed under their respective parent region (slightly toggled to the right).
The selected regions from the different programs will also be visually displayed in an individual summary map (one for each program) on the right hand side of the page.
*Note: At times, warnings will be issued at the parent level. This will be reflected in the user’s email and web page as only the parent region name will be displayed.
*Note: An alert is only created once all the information has been submitted.
Once the alert has been created, the client will be brought back to the ‘Recent Emailed Alerts’ page and the following message will appear in a green box at the top of the page: ‘Your alert has been successfully created. A confirmation notice has been emailed out to you’. The client will also receive a notice to their inbox confirming the creation of the new email.

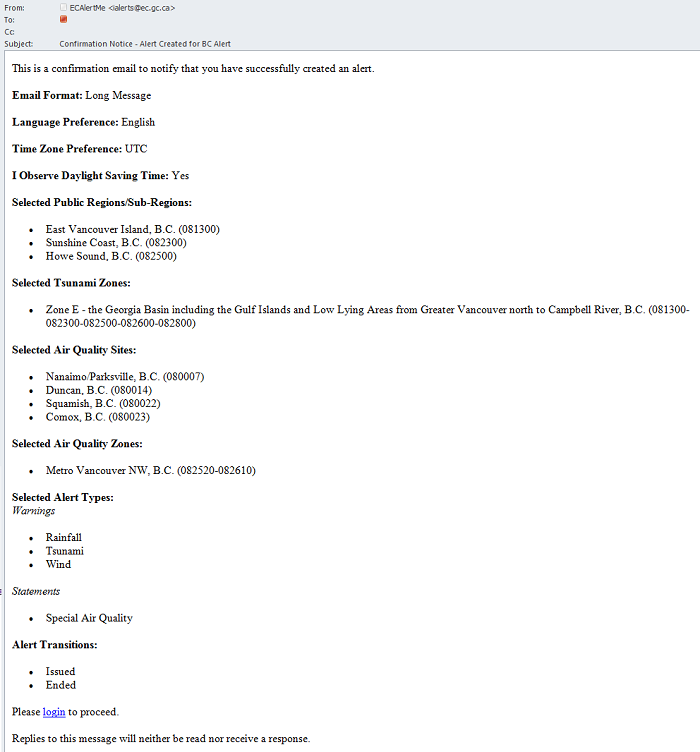
The user will receive an email shortly after confirming the creation of the new alert. The subject of the email will be entitled “Confirmation Notice – Alert Created for <name of alert>”. The content of the email will contain the selected message length (short or long), language preference, selected regions, selected alert types and alert transitions as well as a link to the login page.
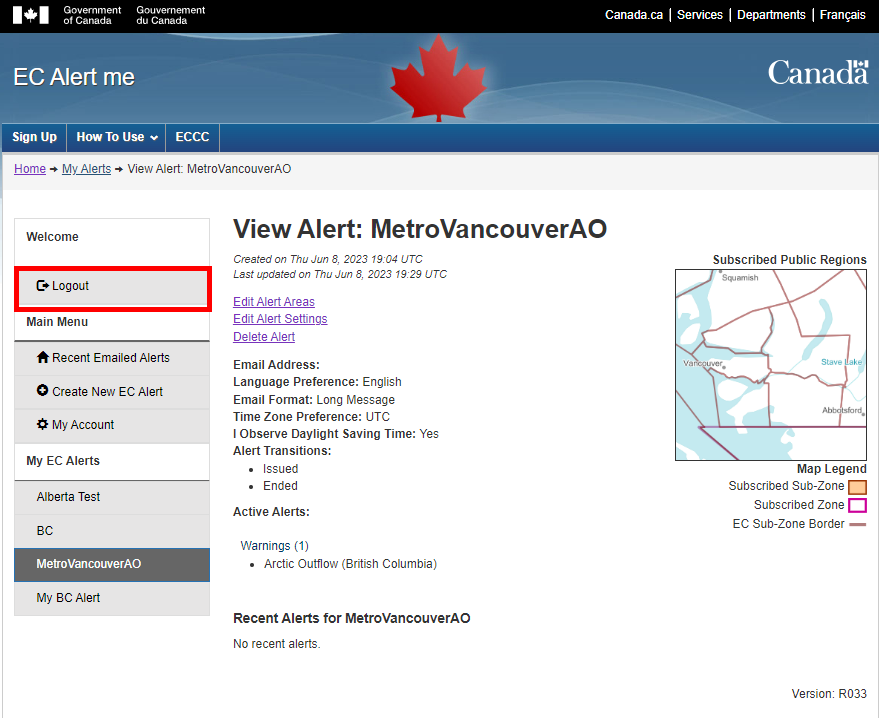
7. Viewing an Alert
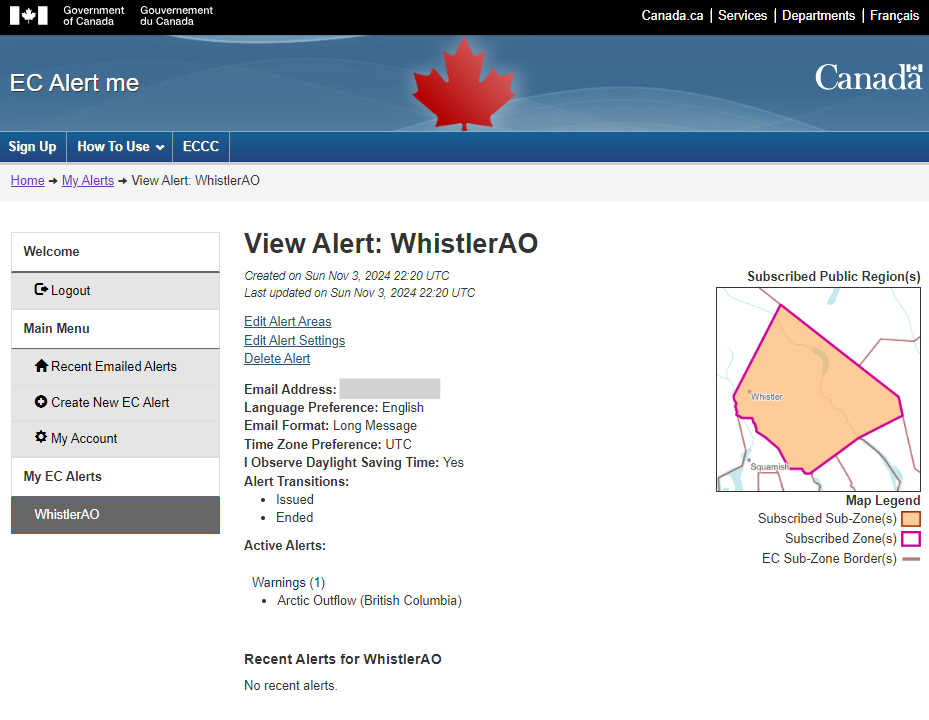
In order to view the details of an alert, the client needs to click on the button that corresponds to it in the left-bar menu. The client is then redirected to a new page where they will be able to view on the right side of the page, the images of the selected regions based on program (public, travellers route, air quality, tsunami, and coastal flooding).
They will also be able to view the assigned email, language preference, email format, time zone preference, daylight saving time preference, alert transitions, active alerts, selected regions (based on program) and recent alerts.
They will also have the option to ‘Edit Alert Areas’, ‘Edit Alert Settings’ or ‘Delete Alert’ when viewing the details of the alert.
8. Modifying an Alert
Modifying an alert is very similar to viewing an alert. The client must select the desired alert they wish to modify in the left-bar menu. Once an alert has been selected, the client will have the option to “Edit Alert Areas” or ‘Edit Alert Settings’.
*Note: A confirmation email will be sent to the client every time an update is made to the alert.
8.1. Modifying Alert Areas
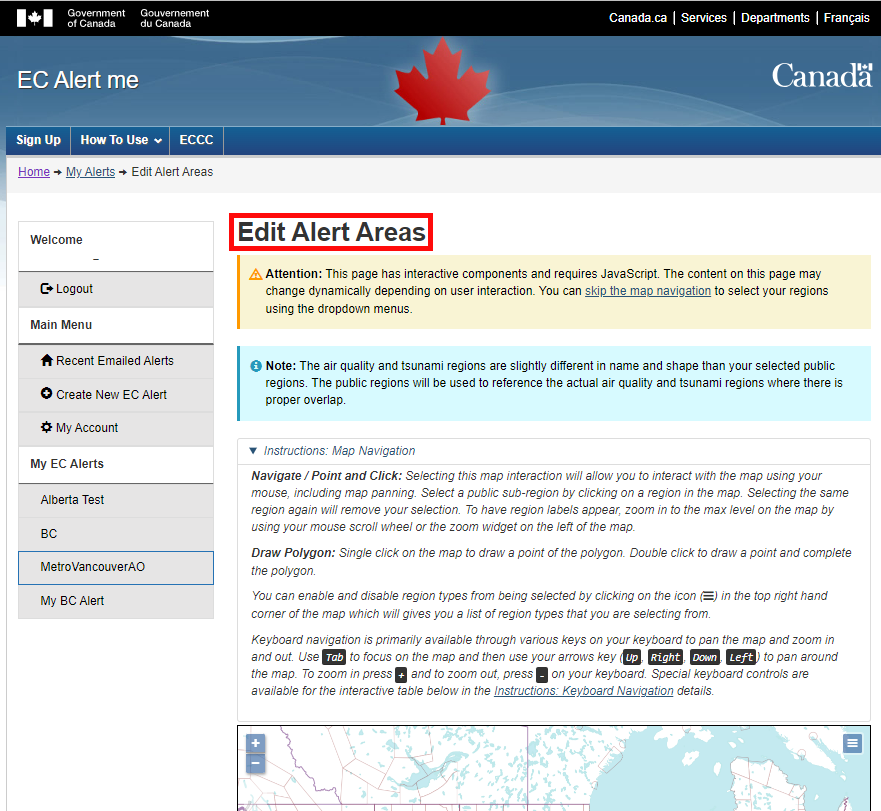
In order to modify an alert area, the client must first select the 'Edit Alert Areas' link.

A new page named ‘Edit Alert Areas: <Name of the Alert>’ will be displayed. The client will be able to remove or add a sub-region to the alert (refer to section 6.1 to learn how to add/remove a sub-region). Once the client has finished modifying the alert, they can save the changes by clicking the “Update Area” button.
*Note: The user can select the “Go Back” button located at the bottom of the page if they wish to return to the previous page without updating their alert.
Once the alert has been modified, a message stating ‘Your alert area has been successfully updated’ will be displayed at the top of the “View Alert: <Alert name>” page.

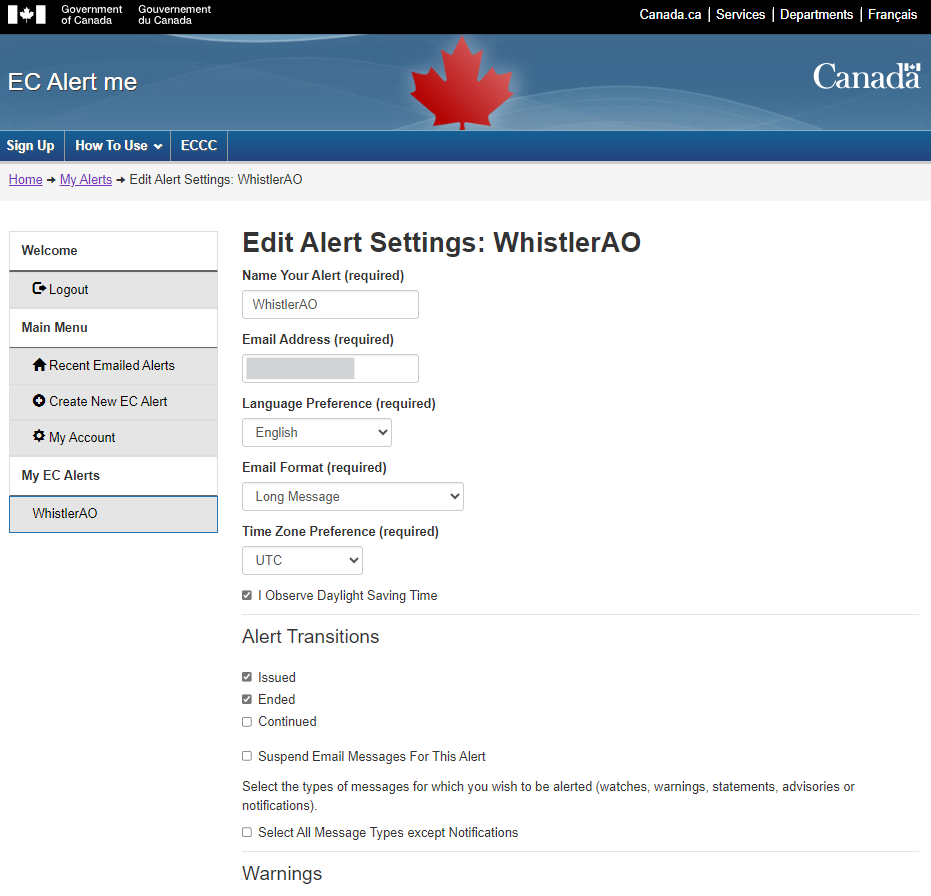
8.2. Modifying Alert Settings
In order to modify the alert settings, the client must first select the 'Edit Alert Settings' link.
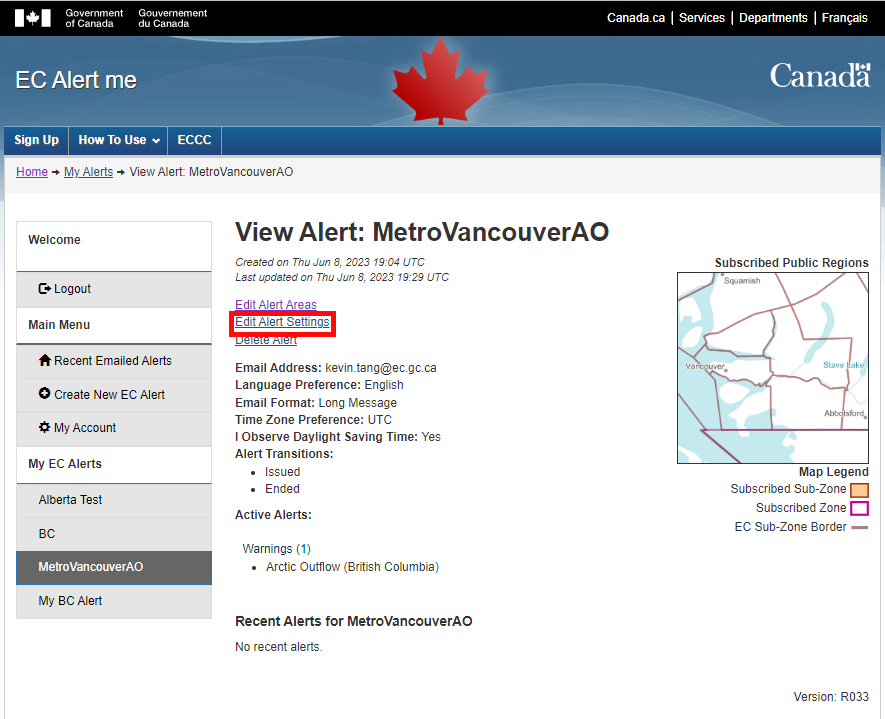
A new page named “Edit Alert Settings: <Name of the Alert>” will be displayed. The client will now be able to modify the alert name, the email address the message is sent to, the language preference, the email format, the time zone preference, the daylight saving time preference, the alert transitions, the alert suspension preference and the message types. Once the client has finished modifying the alert settings, they have to click the ‘Submit Changes’ at the bottom of page.
Once the alert has been modified, a message stating “Your alert settings have been successfully updated” will be displayed at the top of the page.

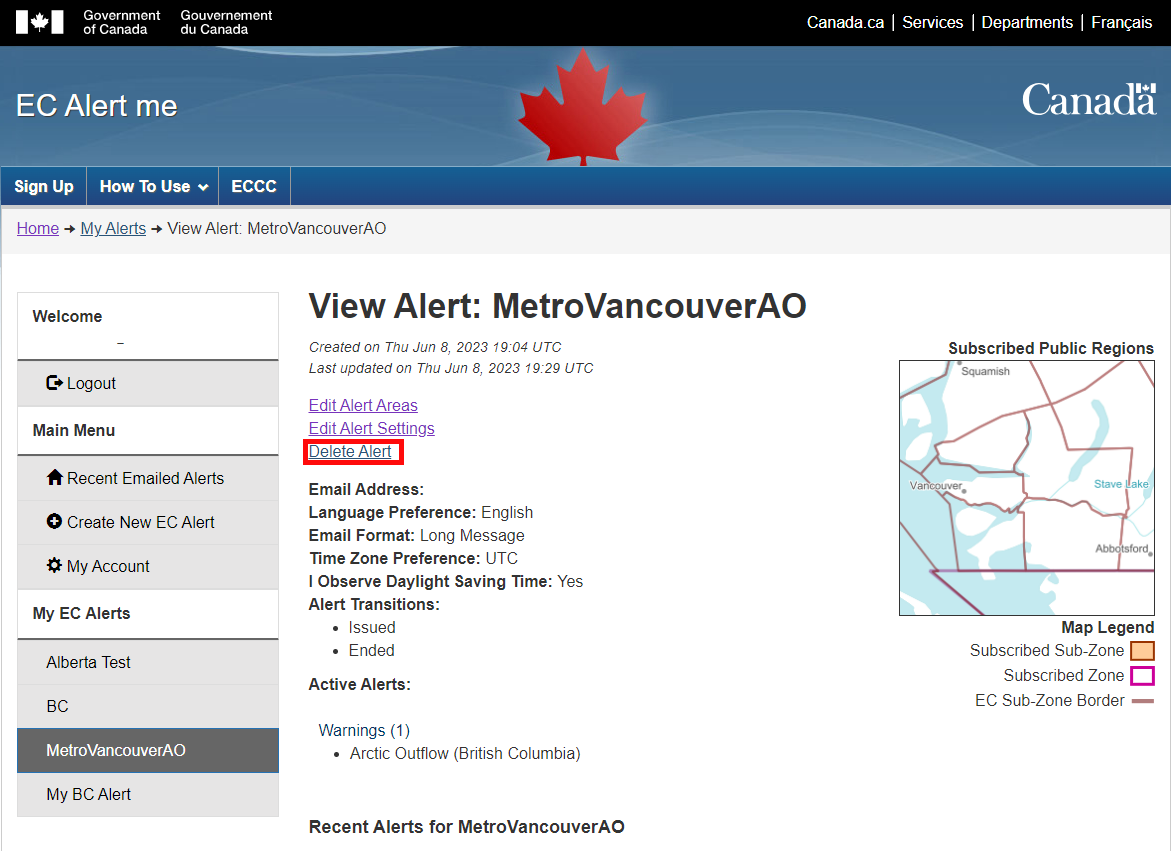
9. Deleting an Alert
In order to delete an alert, the client has to select the alert they wish to delete in the left-bar menu. Once it has been selected, the “View Alert” page will appear containing the alert details. The client has to select the “Delete Alert” link.
A new page will appear containing a message in a yellow box stating: “Are you sure you want to delete this alert?” will be displayed at the top of the page. The client has to click on the “Yes” button in order to delete the alert.
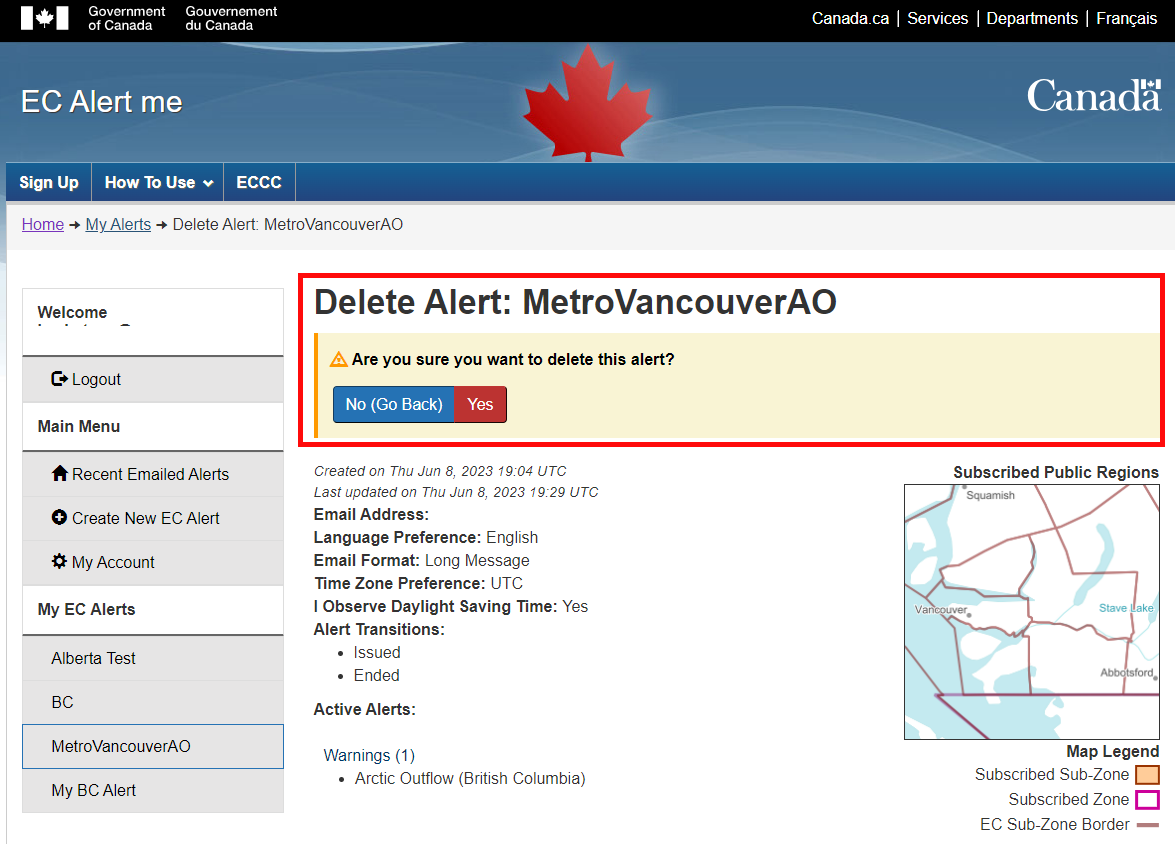
*Note: The “No (Go Back)” button will bring the user back to the “View Alert: <name of alert>” page.
Once the alert has been deleted, the client will be redirected to the “Recent Alert” page where a message in a green box stating ‘Your alert has been successfully deleted’ will be displayed at the top of the page.

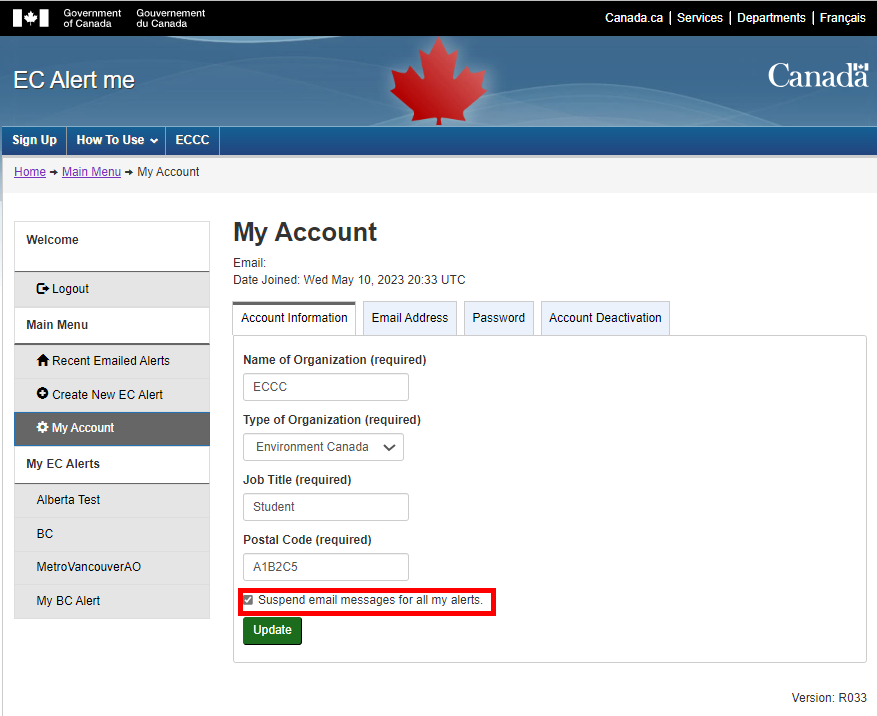
10. Suspend the Receipt of All Alerts
The client can temporarily suspend the receipt of all messages. They can do this by selecting the “My Account” link in the left-bar menu.
Once that is done, the 'My Account' page will be displayed.
The client will be able to temporarily suspend the receipt of all messages by checking ‘Suspend my alerts’ box at the bottom of the page. In order to reinstate the receipt of messages the client shall uncheck the ‘Suspend my alerts’ box. Once the changes have been completed, they will need to click on the ‘Update’ button.
Once the account has been modified, a message in a green box stating ‘Your user information has been updated’, will appear at the top of the page.
*Note: The client shall also be able to suspend the receipt of messages for individual alerts (see section 8.2).
11. Logout
When the client is done using the EC Alert me interface, they can logout of their account by clicking on the ‘Logout’ button in the left-bar menu.
Once the client has logged out, they will be brought back to the login page where a message in a green box stating ‘You have successfully logged out’ will appear at the top of the page.
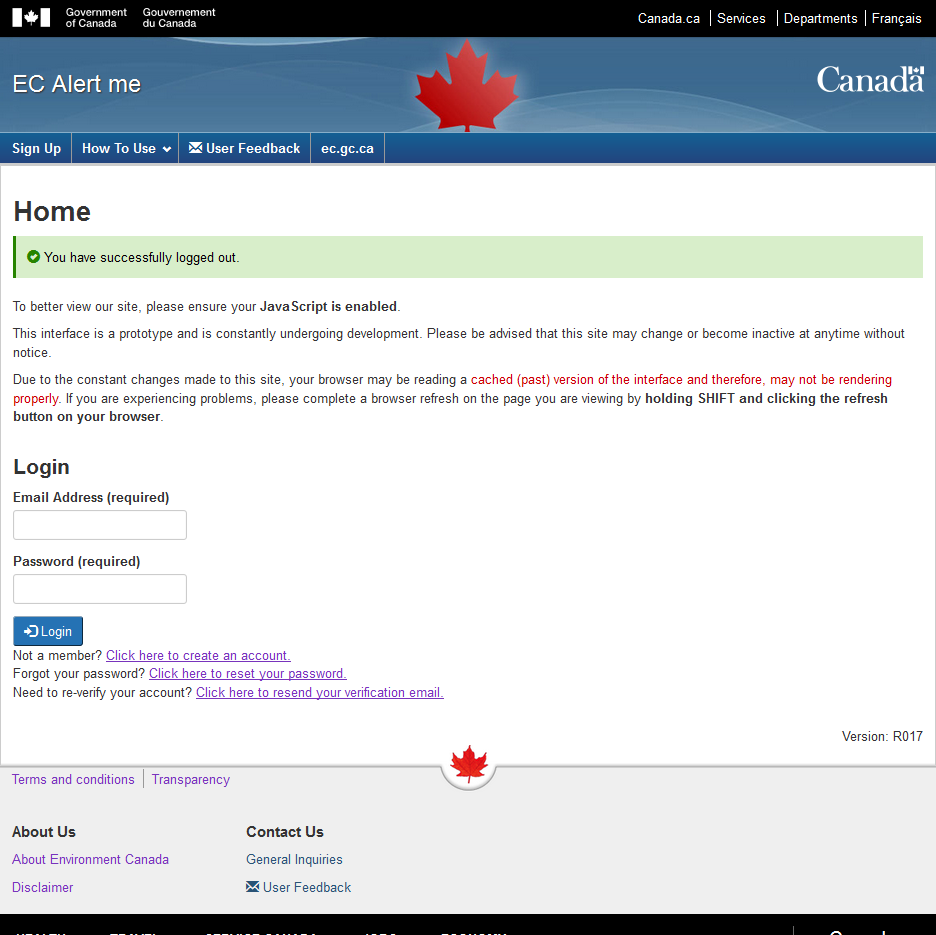
*Note: The account will time out after 20 minutes of inactivity.
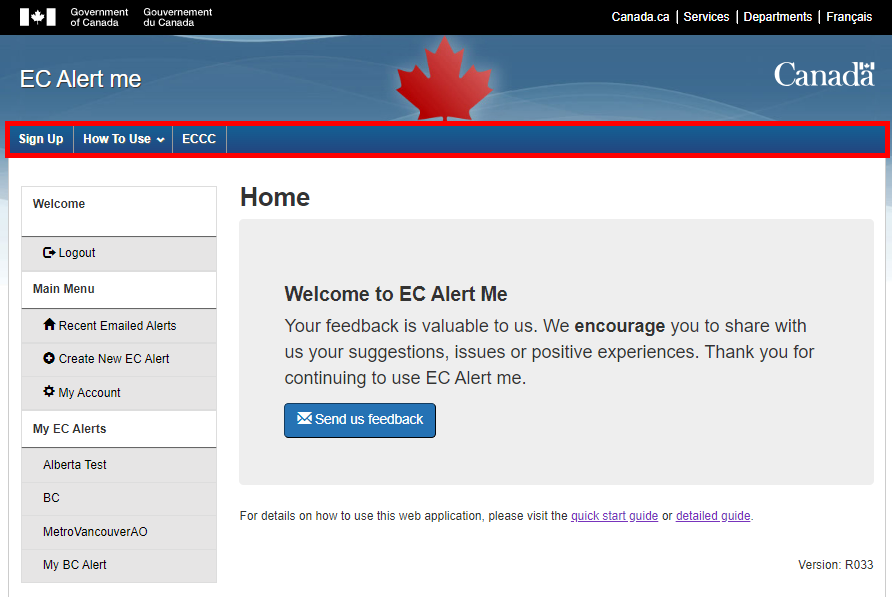
12. Navigating The Top Navigation Menu of The EC Alert Me Website
The EC Alert me client interface contains a top navigation menu that allows the client to easily navigate the client interface at the touch of a button.
12.1. Sign Up
The first tab in the top navigation menu brings the client to the “Create Account” page. From there, the client can enter all of his information in order to create an account.
The “Create Account” page is the following:
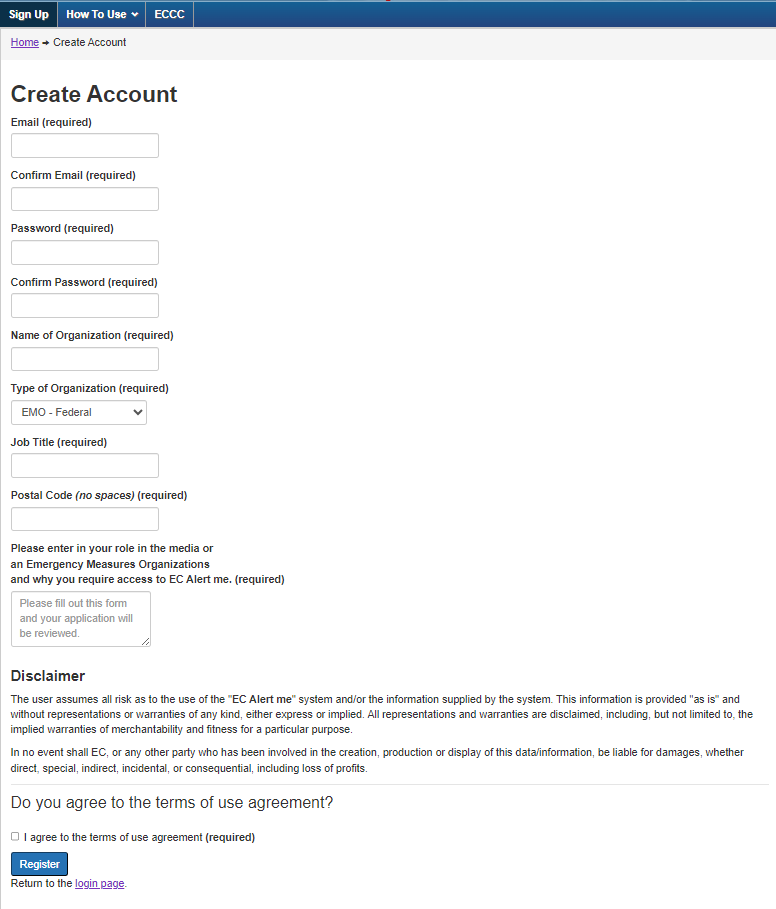
*Note: For more information on the "Create Account" page, refer to section 2.
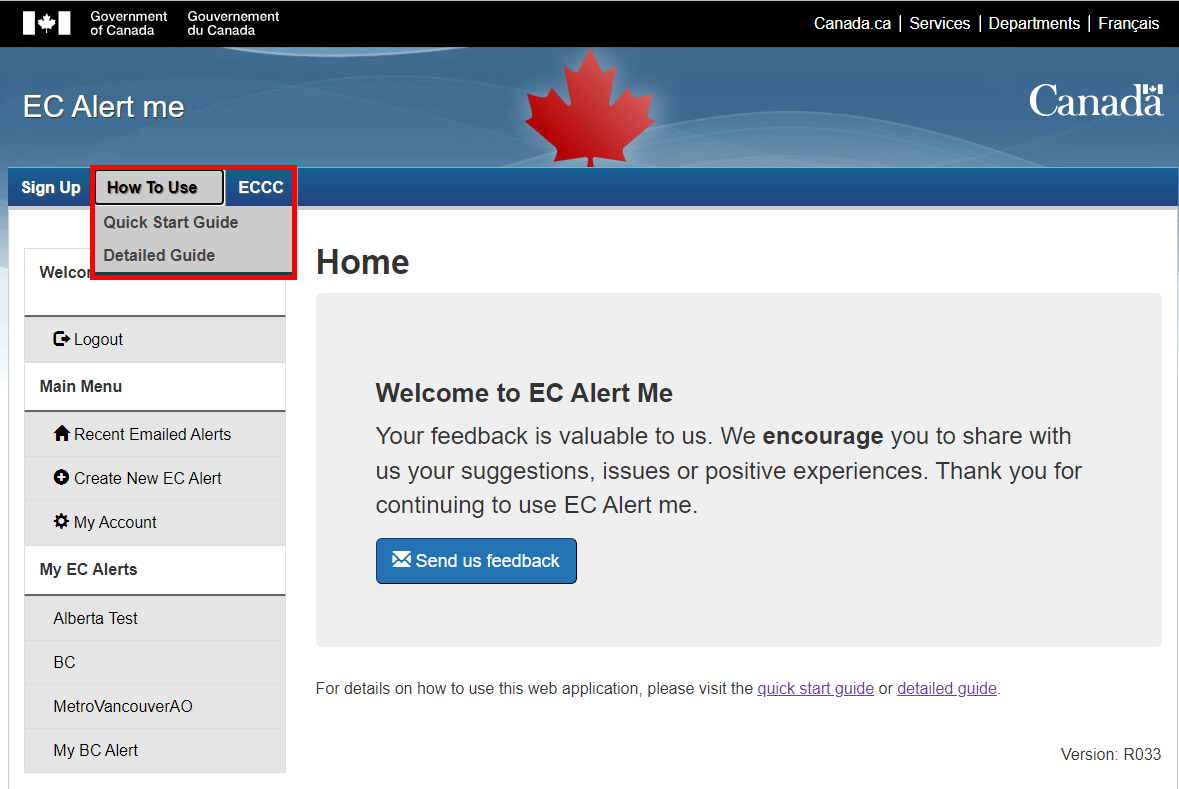
12.2. How to Use
The second tab in the top navigation menu contains the guides to navigating the EC Alert me client interface.
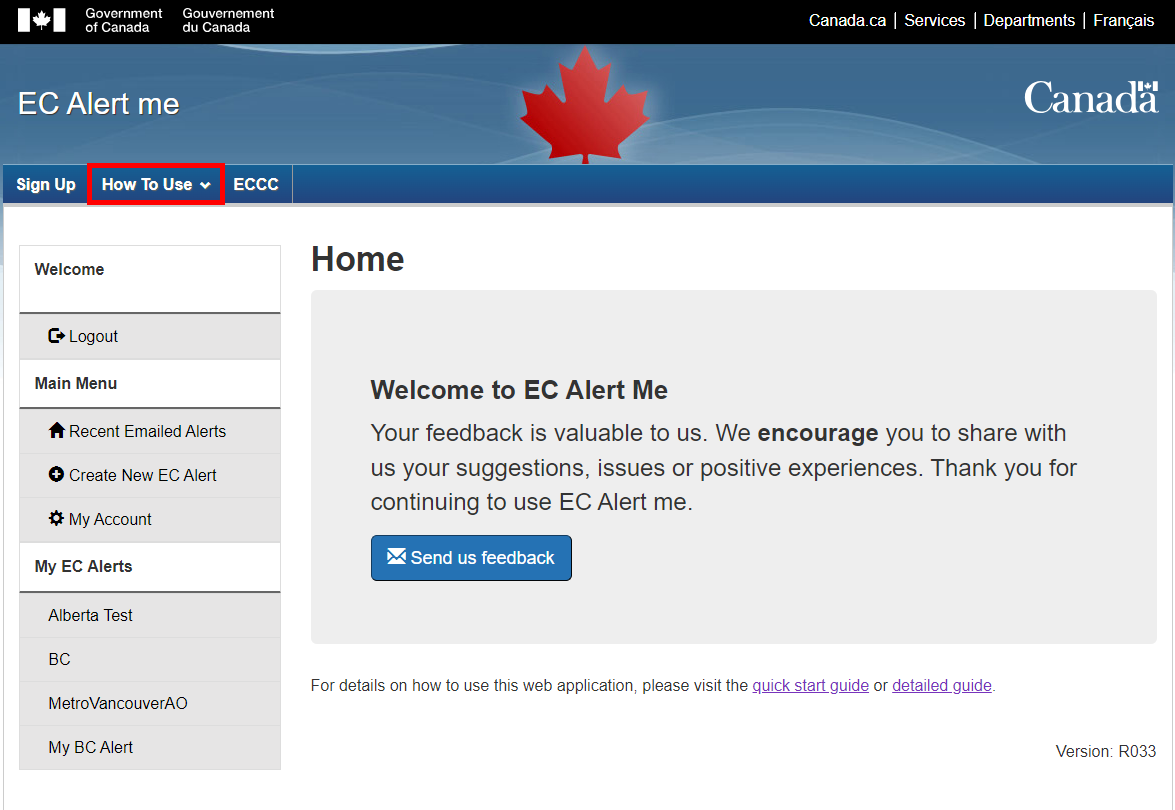
The “How To Use” tab will redirect the user to the page where all the user guides are located.
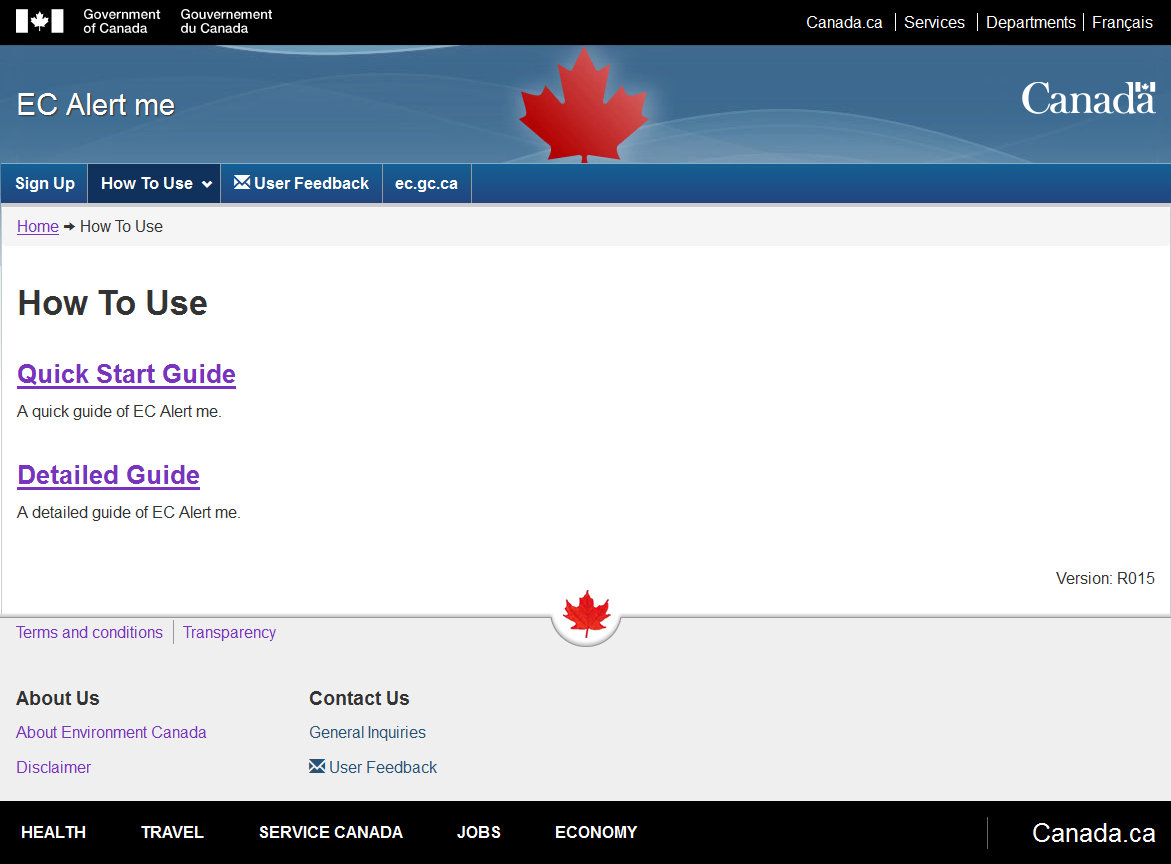
Selecting the tab, gives the user the choice of viewing two guides:
- The "Quick Start Guide"
- The "Detailed Guide"
The "Quick Start Guide" is a short document that gives a brief explanation to the users on the basic functions of the interface:
- User sign up
- Login
- Creating a New Alert
- Viewing Recent Alerts
- Logout
The "Detailed Guide" is a very descriptive document that goes into detail of each aspect of the client interface. The client can obtain information on different sections in order to learn:
- What is EC Alert me
- How to create and modify an account
- How to log in and log out of the interface
- How to create, view, modify and delete an alert
- How to navigate through the EC Alert me interface
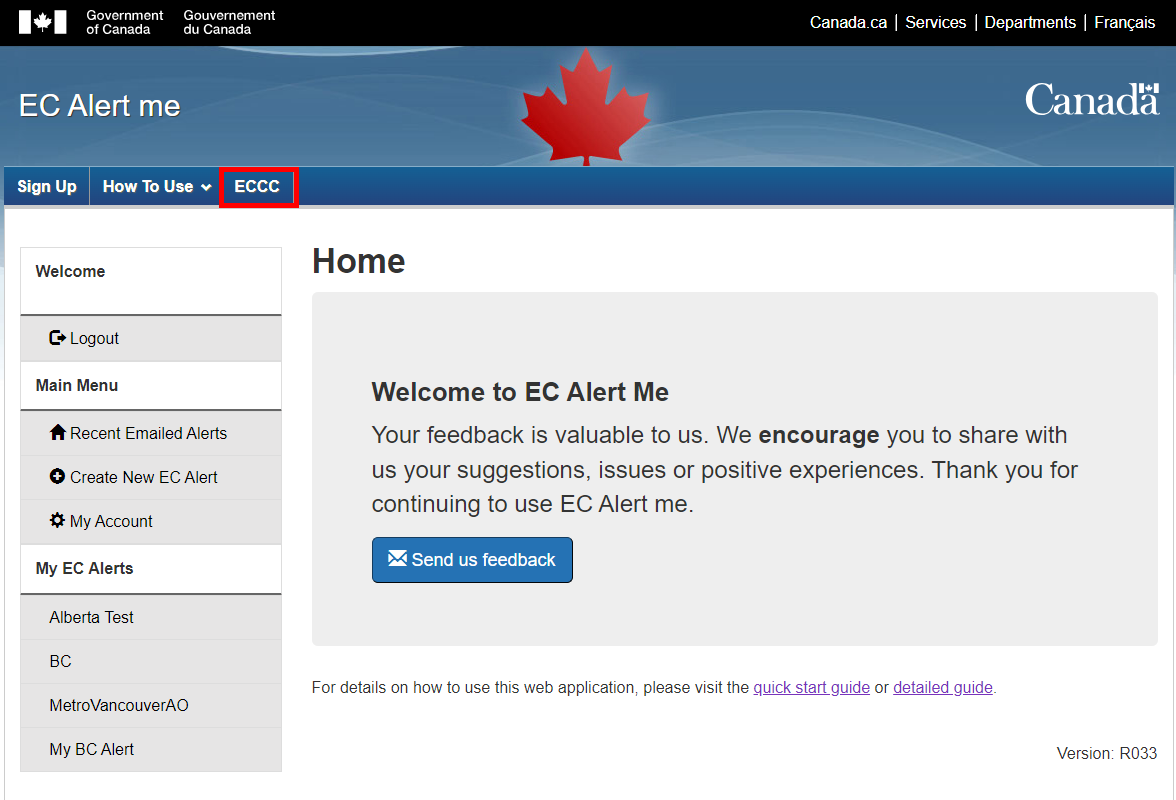
12.3. ECCC
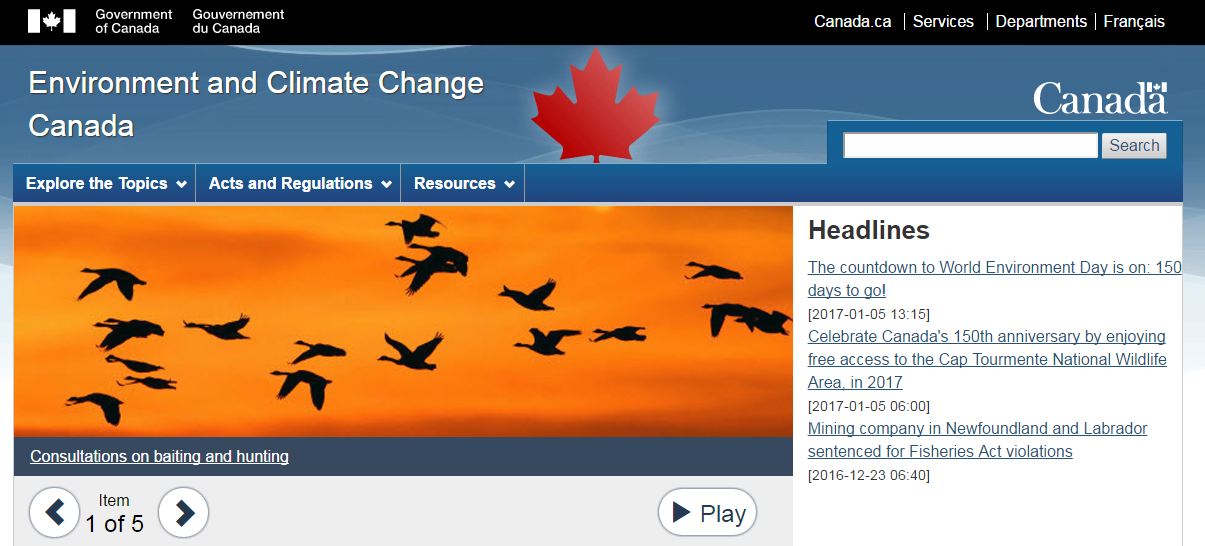
The third tab in the top navigation menu, “ECCC” gives the client access to the Environment Canada website.
The following webpage will pop up in a separate window.
12.4. Breadcrumb
The breadcrumb located underneath the top navigation menu gives the user the option to navigate to pages above the current page within the site's hierarchy.
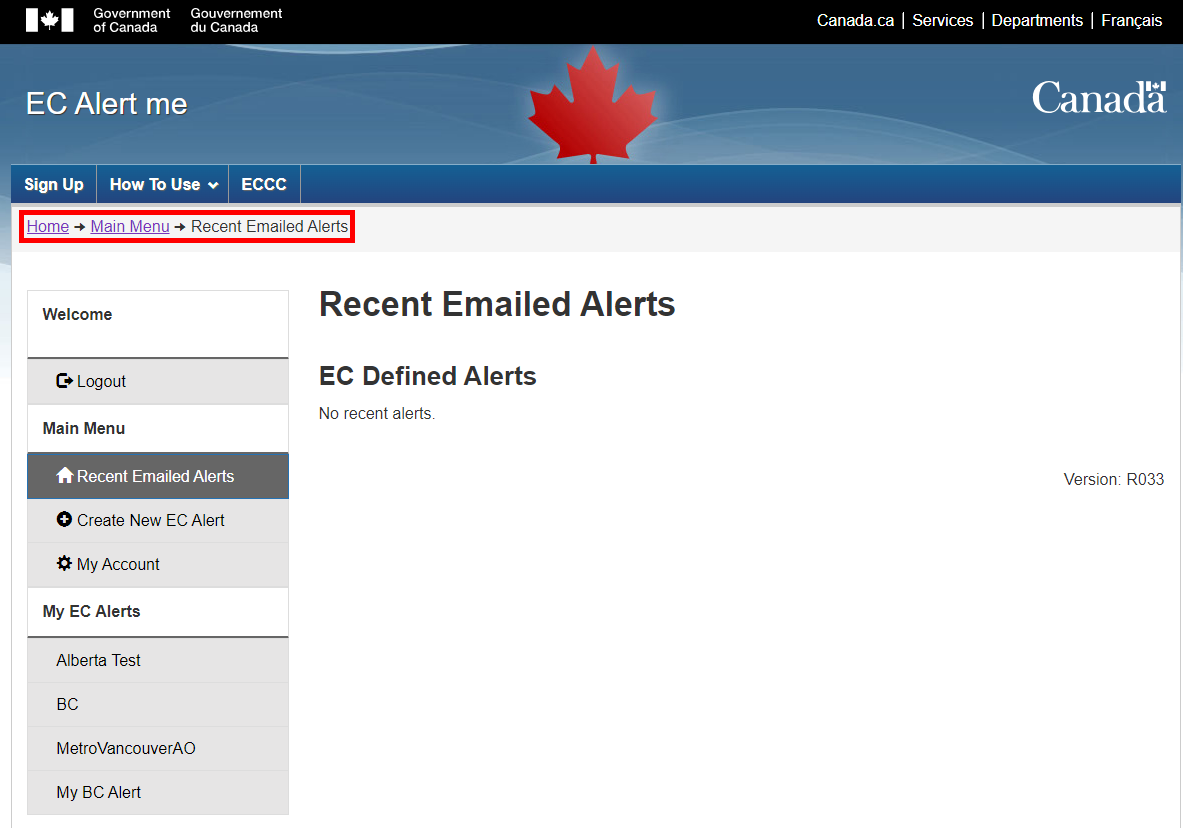
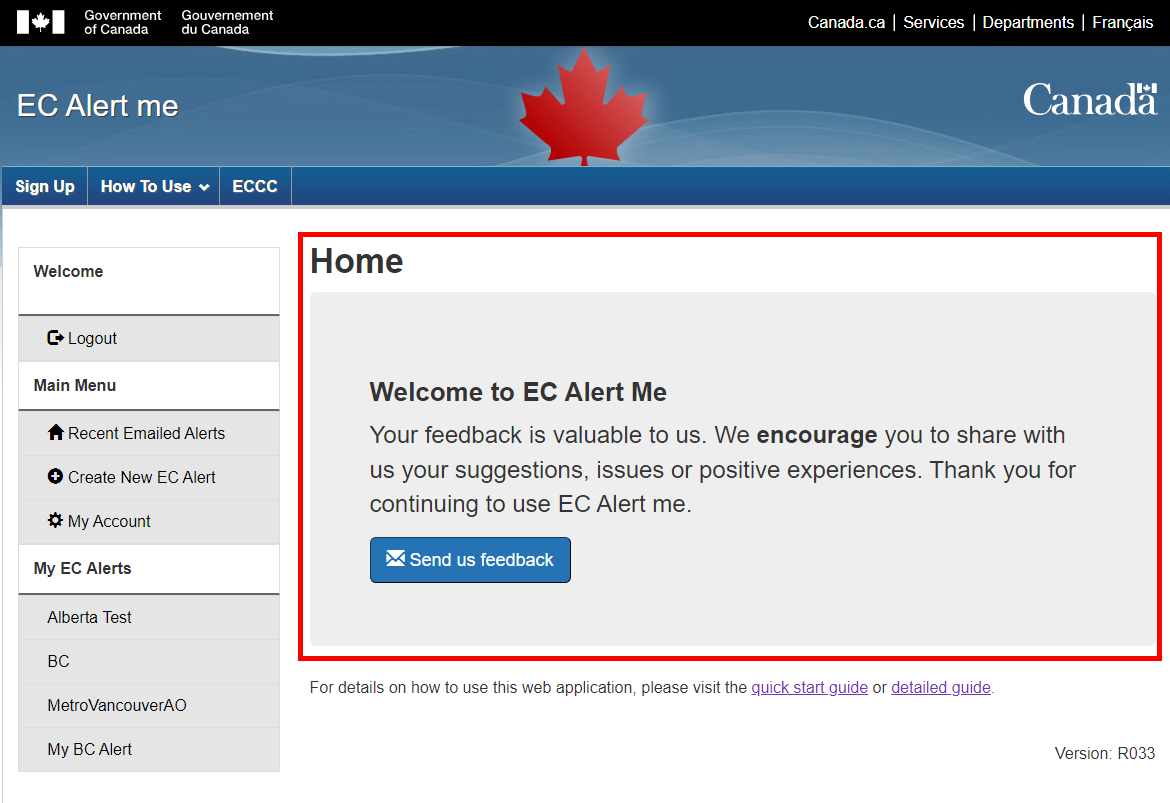
The “Home” breadcrumb will bring the user to the Home webpage. This page will allow the user to “Send us feedback” or gain access to the “Quick Start Guide” and the “Detailed Guide”.
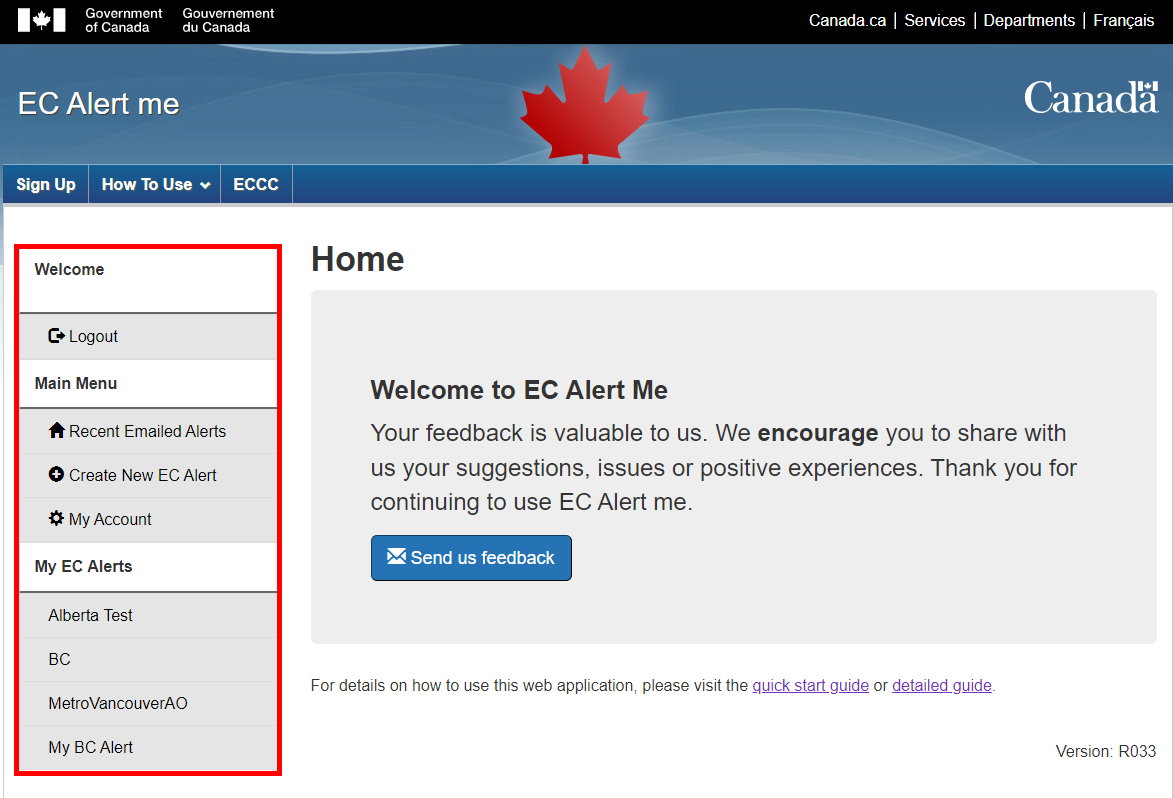
13. Navigating The Left-Bar Menu of The EC Alert Me Website
The EC Alert me client interface contains a left-bar menu that allows the client to easily navigate the client interface at the touch of a button.
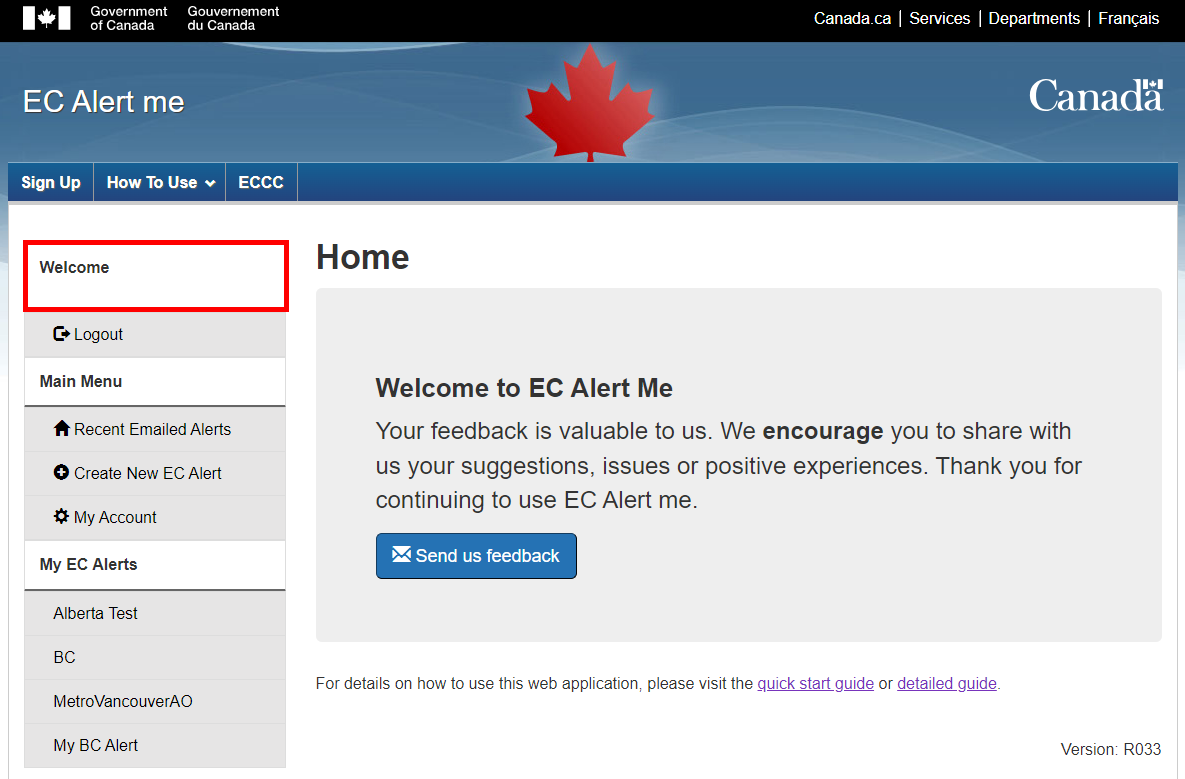
13.1. Welcome <user email>
The “Welcome <user email>” welcomes the client and allows them to see which account they are using.
13.2. Logout
When the client is done using the EC Alert me client interface, they must logout of their session by clicking on the 'Logout' button in the left-bar menu. Once the client has logged out, they will be brought back to the 'EC Alert me: Login' page.
*Note: For more information on the "Logout", refer to section 11.
13.3. Main Menu
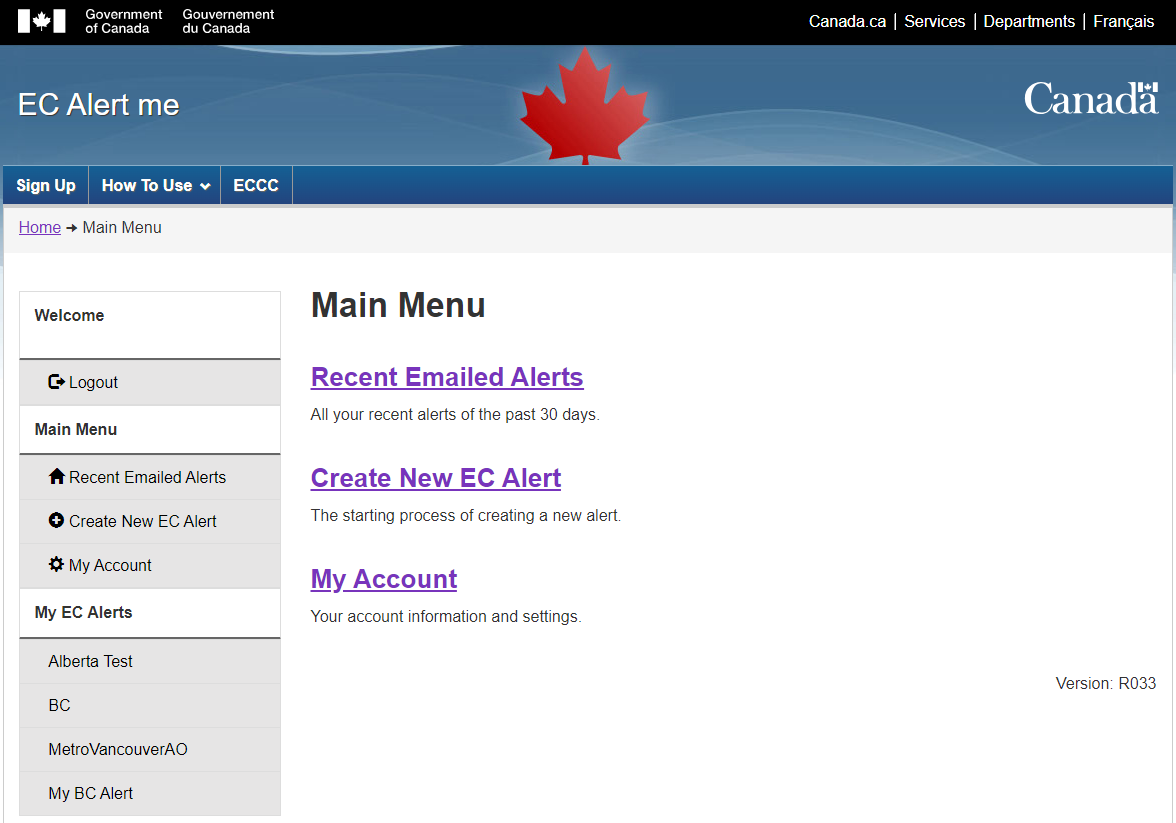
The Main Menu tab brings the client to the "Main Menu" page.
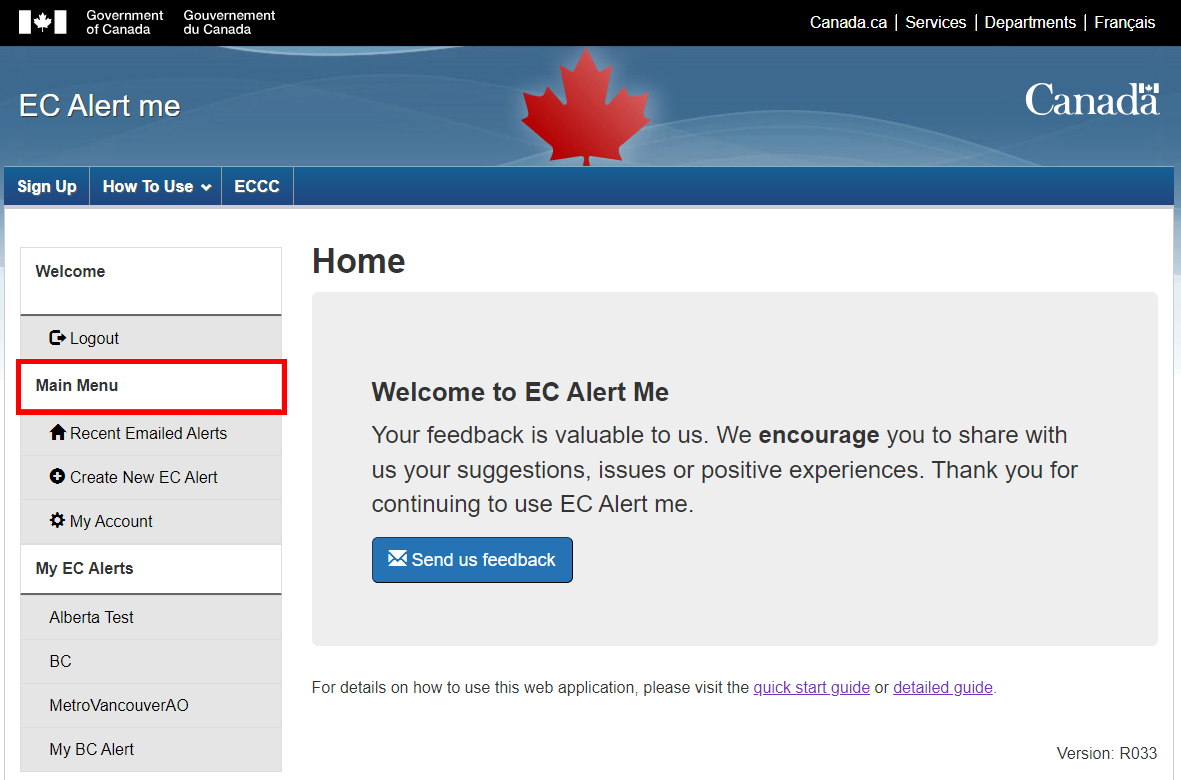
This page displays three links that the user can select to be brought to the page in question: Recent Emailed Alerts page, Create New EC Alert page and My Account page.
13.4. Recent Emailed Alerts
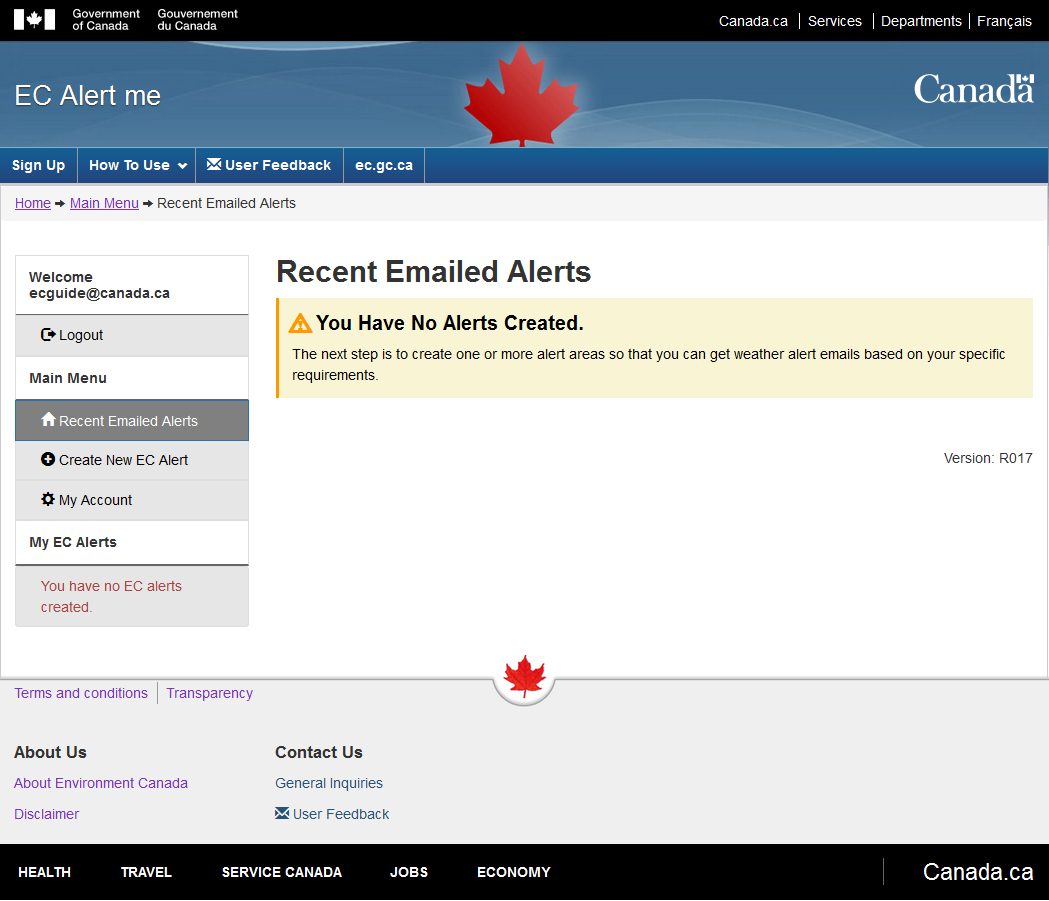
The Recent Emailed Alerts tab brings the client to the ‘Recent Emailed Alerts’ page. This is the first page that appears when the client logs in to their account. This page displays all the recent alerts that have been issued for which they are registered. The client can access this page by clicking on the first tab in the Main Menu part of the left bar menu.
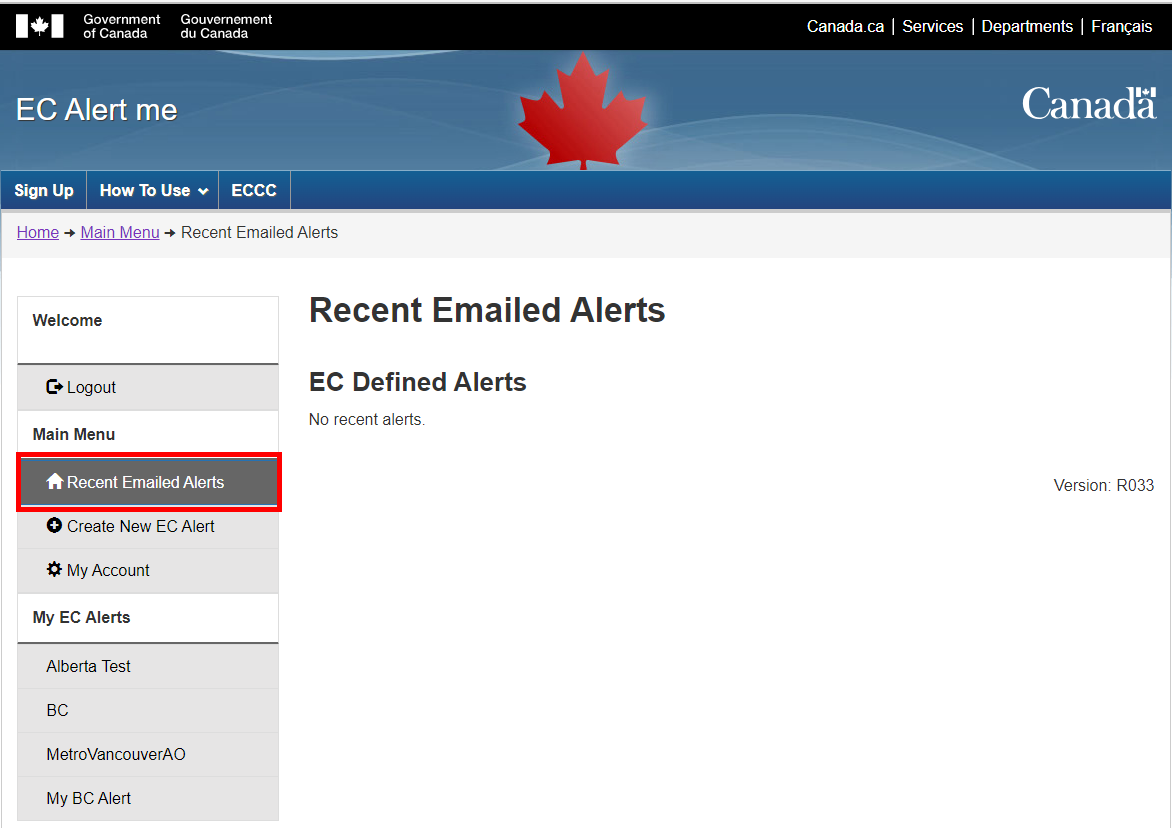
The "Recent Emailed Alerts" page is the following:

On the “Recent Emailed Alerts” page, the client has the ability to view more details about each alert by clicking on the alert name (the name is also an active link). It will bring the user to the “View alert” page for that particular alert.
They will also be able to click on the ‘View More’ link. This will bring the user to a new page where they will be able to view more details about the status of the alert at the time the message was delivered.
*Note: The information displayed on the page after clicking the “View More” link is the status of the alert at the time it was issued. It does not reflect current conditions unless the alert has recently been issued. The page is displaying historical data.
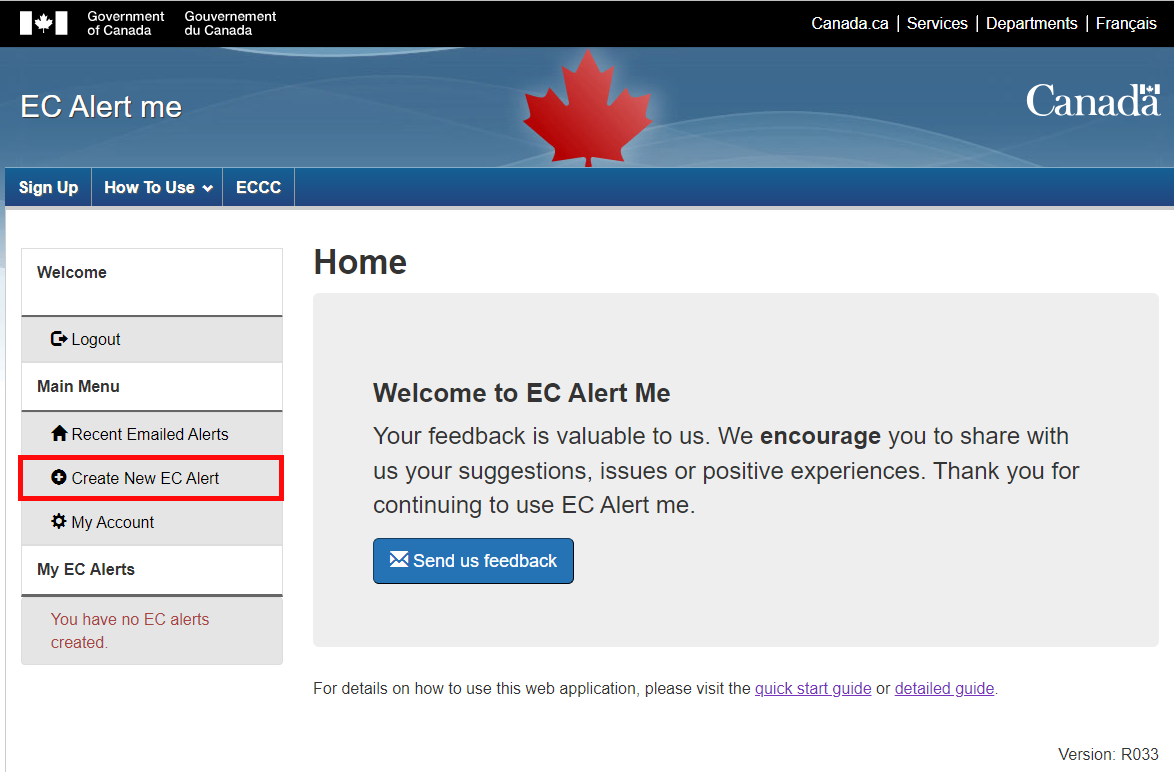
13.5. Create New EC Alert
The 'Create New EC Alert' link in the left-bar menu allows the client to create a new alert. It is the second link under the "Main Menu" section of the left bar menu.
When they click on the link, a new page will be displayed. The customer will then be prompted to provide all the information needed to create a new alert (see section 6).
All the user created alerts will be located under the “My EC Alerts” section of the left-bar menu. Each button will display the properties of the alert already created by the client.
*Note: For more information on the "Create New Alert" page, refer to section 6.
13.6. My Account
The third link under the “Main Menu” section of the left-bar menu called ‘My Account’ displays the client’s account information that was entered while they created an account. This page provides the client with the option to modify certain aspects of their account.
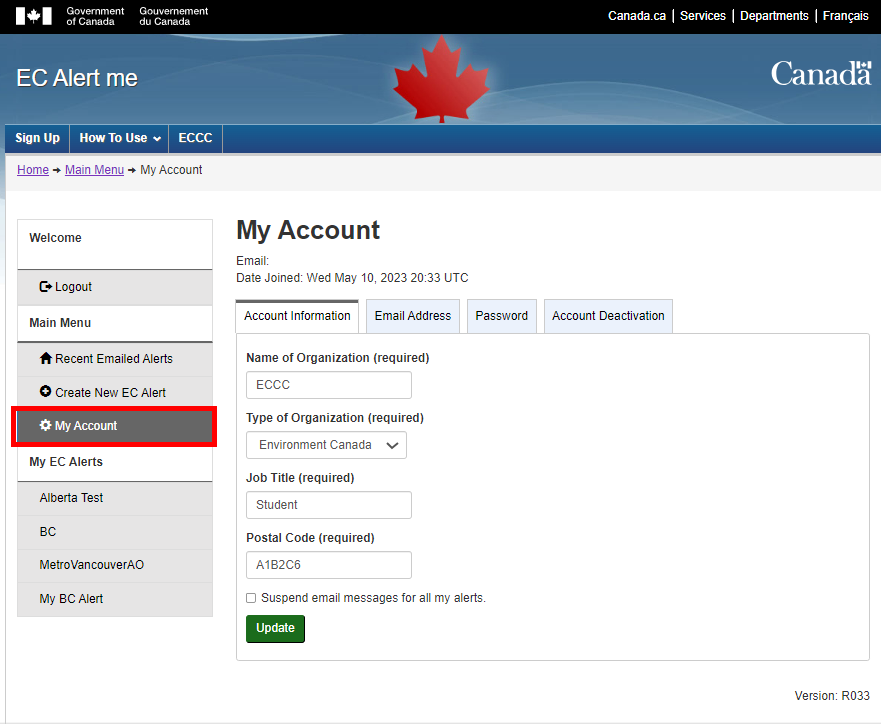
This page will allow the client to change their email address, password, name of organization, type of organization, job title and postal code. They will also have the option of suspending all their alerts; no messages will be sent.
*Note: For more information on the “My Account” page, refer to section 5.
13.7. My EC Alerts
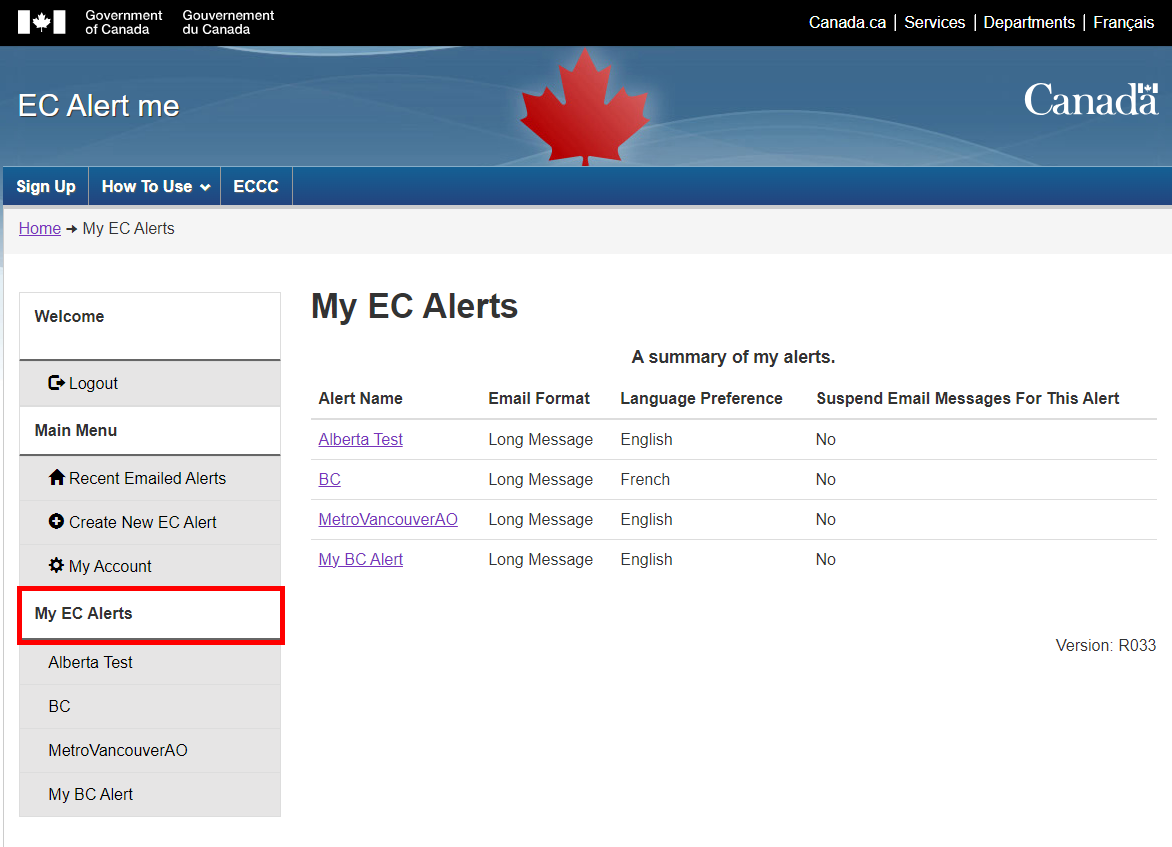
The “My EC Alerts” link brings the user to the “My EC Alerts” page. The links listed under the “My EC Alerts” section in the left hand menu are the user created alerts. They will bring the user to the “View alert” page for that particular alert.
The "My EC Alerts" page is the following:
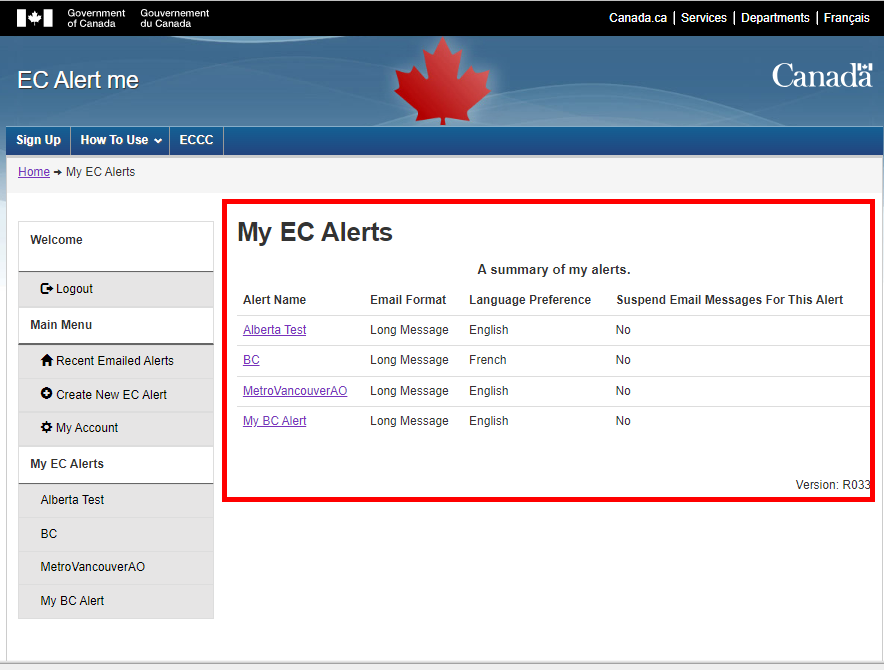
The page gives a summary to the user of all the alerts they created. It lists the name of the alert, the length of the message, the selected language and the number of regions that have been selected per alert.
The alert name in the page is displayed as a hyperlink. It will bring the user to the “View alert” page for that particular alert.
*Note: For more information on the “View Alert” page, refer to section 7.
14. Renewing your account
To confirm that the user of an email address still wishes to use the EC Alert me services, an annual verification email is sent to subscribers. This renewal email is sent four weeks before the first anniversary of the account setup or one year after the account was last renewed. Reminder emails are sent each week after that, until the account is renewed or deactivated one year after the last renewal.

Once the renewal link is clicked, it will open a page in your web browser and confirm your renewal by loading the renewal webpage. This webpage will display the message: “Thank you for renewing your account”. At that point, the account will be renewed for another year.

If the account is not renewed by the specified date, the account will be deactivated, and a deactivation notification will be sent to the user. If your account was deactivated in error, please contact us at ecmeteo@ec.gc.ca for assistance.

- Version:
- R044.2